Omarchy on the Thinkpad T14 Gen 6: Mini-Review and Full Setup
I bought a Lenovo Thinkpad T14 Gen 6 and installed Omarchy on it. It’s not my main machine, and it’s not supposed to be. It’s a companion: a notebook I can open on the 3D printing office desk, SSH into the desktop, fire up Claude Code, access files on the NAS, debug the network through ethernet without hunting for a USB dongle and a long cable. This article covers the hardware choice, the Omarchy setup on top, the customizations specific to a laptop and to this Thinkpad in particular, and the architecture decisions that might not be obvious.
Mini-review of the Thinkpad T14 Gen 6
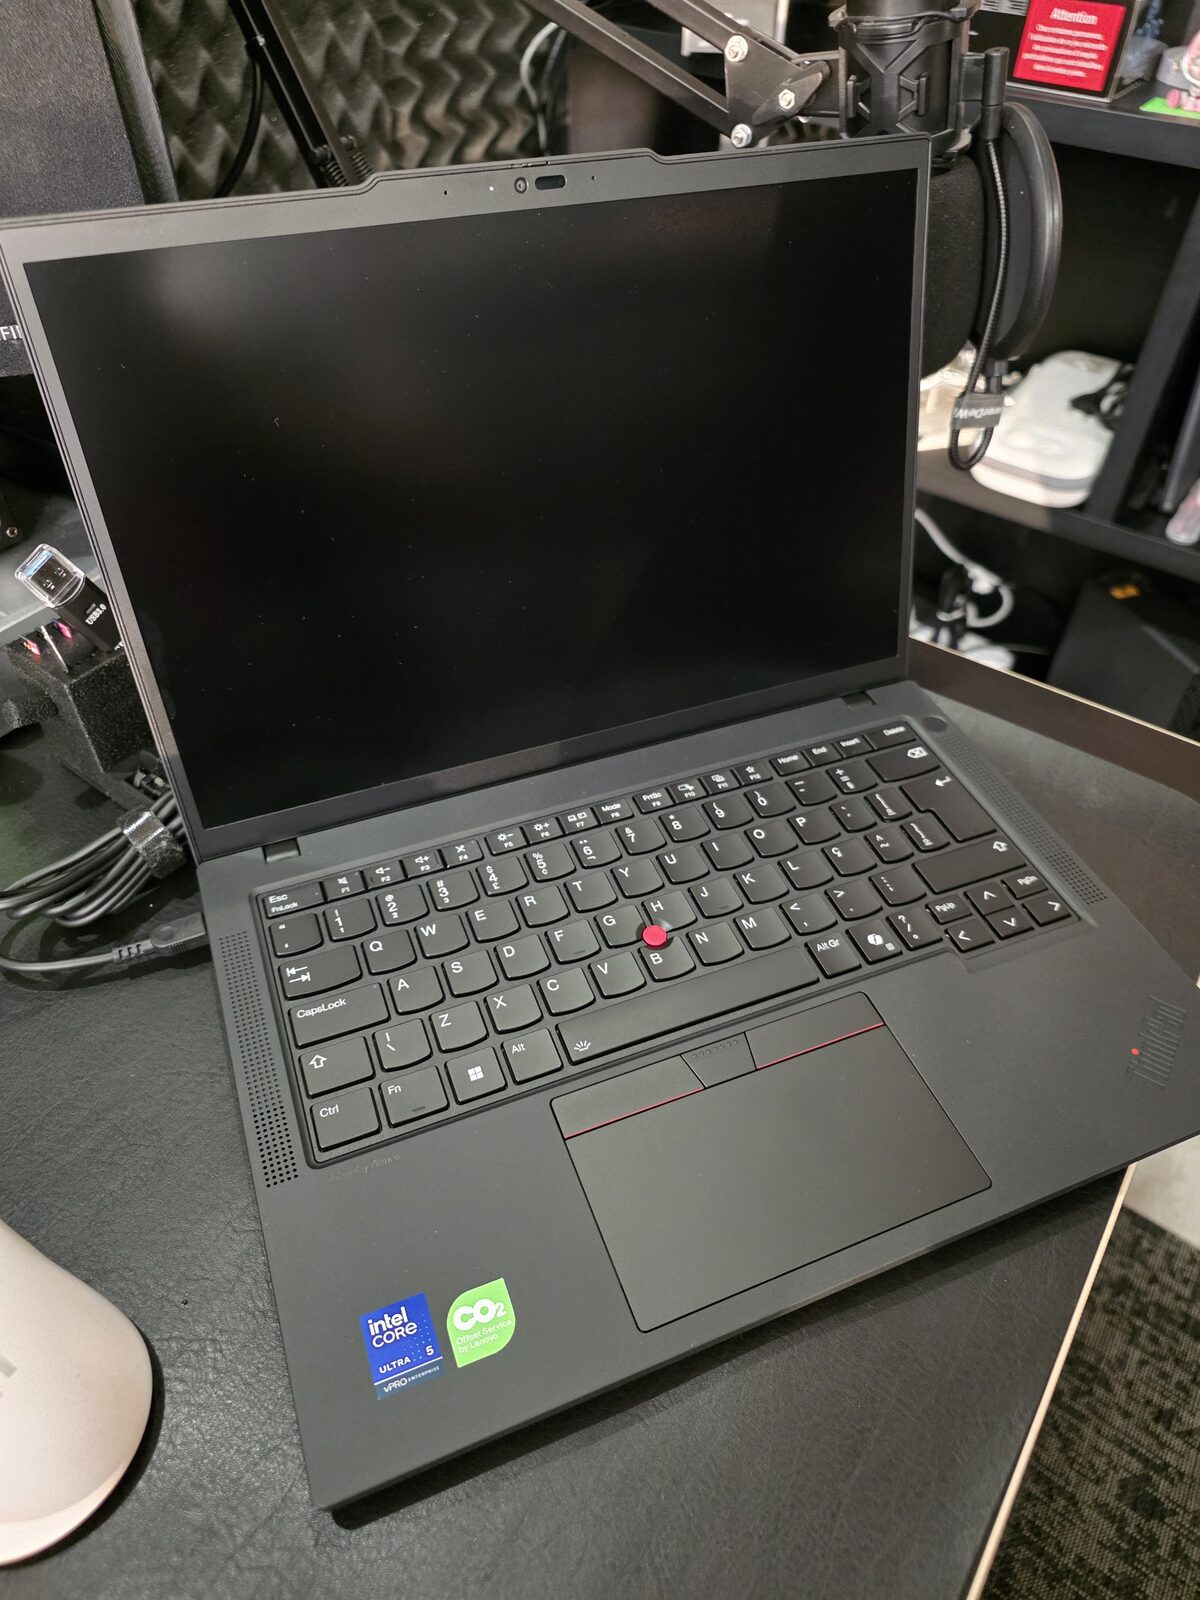
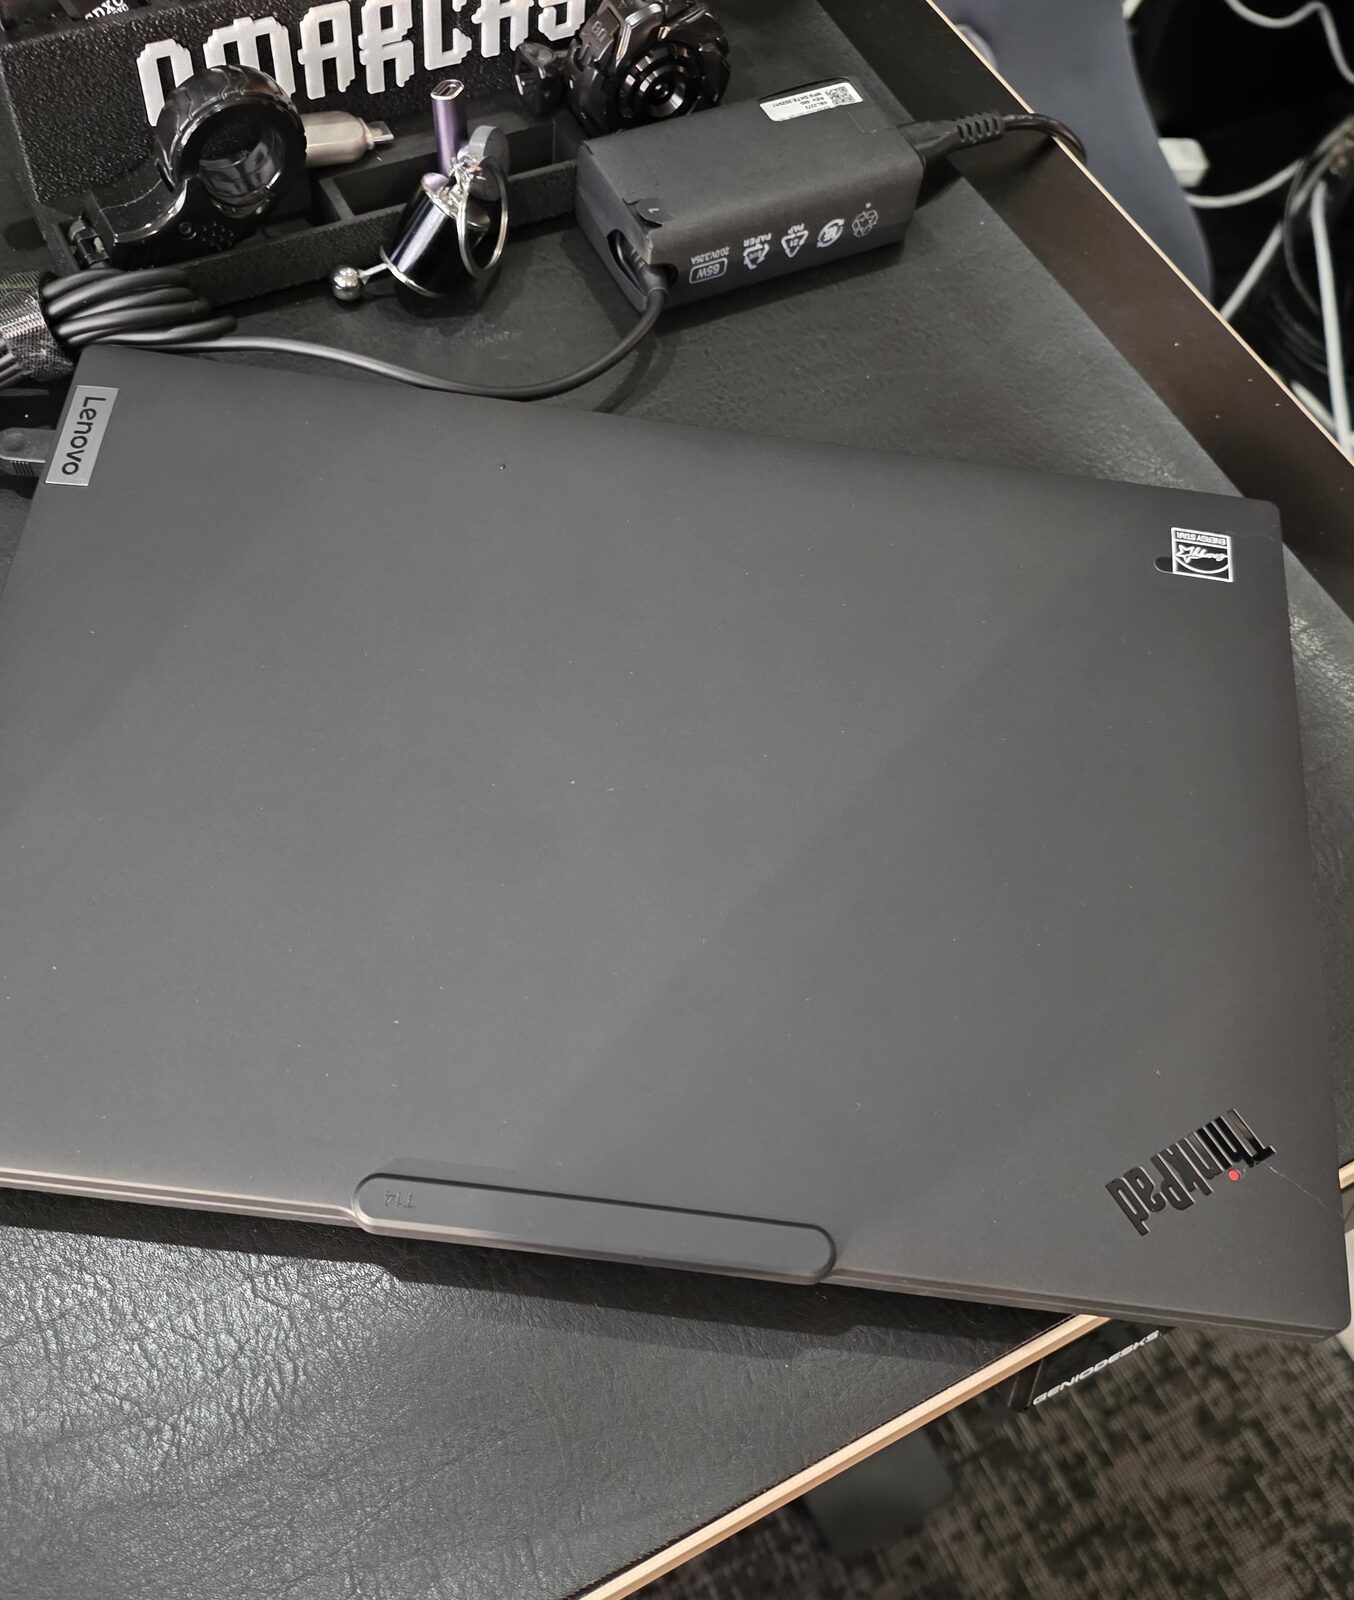
Let’s get this out of the way: this isn’t the notebook of my dreams. If I were picking by looks, I’d grab an Asus Zenbook S 14 with an OLED screen. If I were picking by portability, the Thinkpad T14s with the aluminum shell, which is lighter and much better looking. The regular T14 has a 14" 1920x1200 IPS panel, 400 nits, 60Hz, no HDR. It gets the job done, but it’s a far cry from the Zenbook’s screen. The shell is plastic with a rubberized finish, which makes it scratch-resistant but not premium. Reviews from NotebookCheck and XDA Developers land on the same verdict: good price, good connectivity, fine performance for office work, but the screen is dated.
What makes up for it:
- Port selection. Full-size HDMI. Gigabit ethernet. USB-A, USB-C Thunderbolt 4, charges over USB-C (not a proprietary charger). For a debug companion, this is exactly what I wanted. The Zenbook S 14, being thinner, cuts ports.
- Fingerprint sensor that actually works on Linux (Goodix MOC, works with libfprint on kernel 6.11+). I use this, details later.
- Thinkpad keyboard. 1.5mm key travel, trackpoint, classic layout. It’s not the best keyboard in the world in 2026, but it’s reliable and durable.
- Rugged shell. It will fall, it will scratch, it will travel in a backpack. If I put a Zenbook OLED or a Macbook Pro on the 3D printing office desk next to the printer with PLA dust in the air, I’d be nervous. The Thinkpad can take a beating.
If I wanted a gaming machine, I’d get an Asus Zephyrus G14, my favorite gaming notebook. If I wanted a creative work machine, I’d get the Asus Zenbook Duo (UX8406) with two vertical OLED screens, great for video editing and 3D modeling. I can afford any Macbook Pro or Mac Studio, and I chose not to go that way. I’ll explain in the next section.
My use case
My main PC is a desktop with Ryzen 9 7950X3D, 96 GB of RAM, RTX 5090 with 32 GB. That’s where I work, experiment with local models, run containers, edit the blog. For gaming, I have a separate mini-PC with an RTX 4090. Those two cover 100% of what I need to do at home.
The notebook exists to cover the remaining 1%: sitting on the couch, taking it to the 3D printing office, taking it to the kitchen, short trips. It’s not meant to replace the desktop. It’s meant to give me remote access to the desktop when I’m away from it.
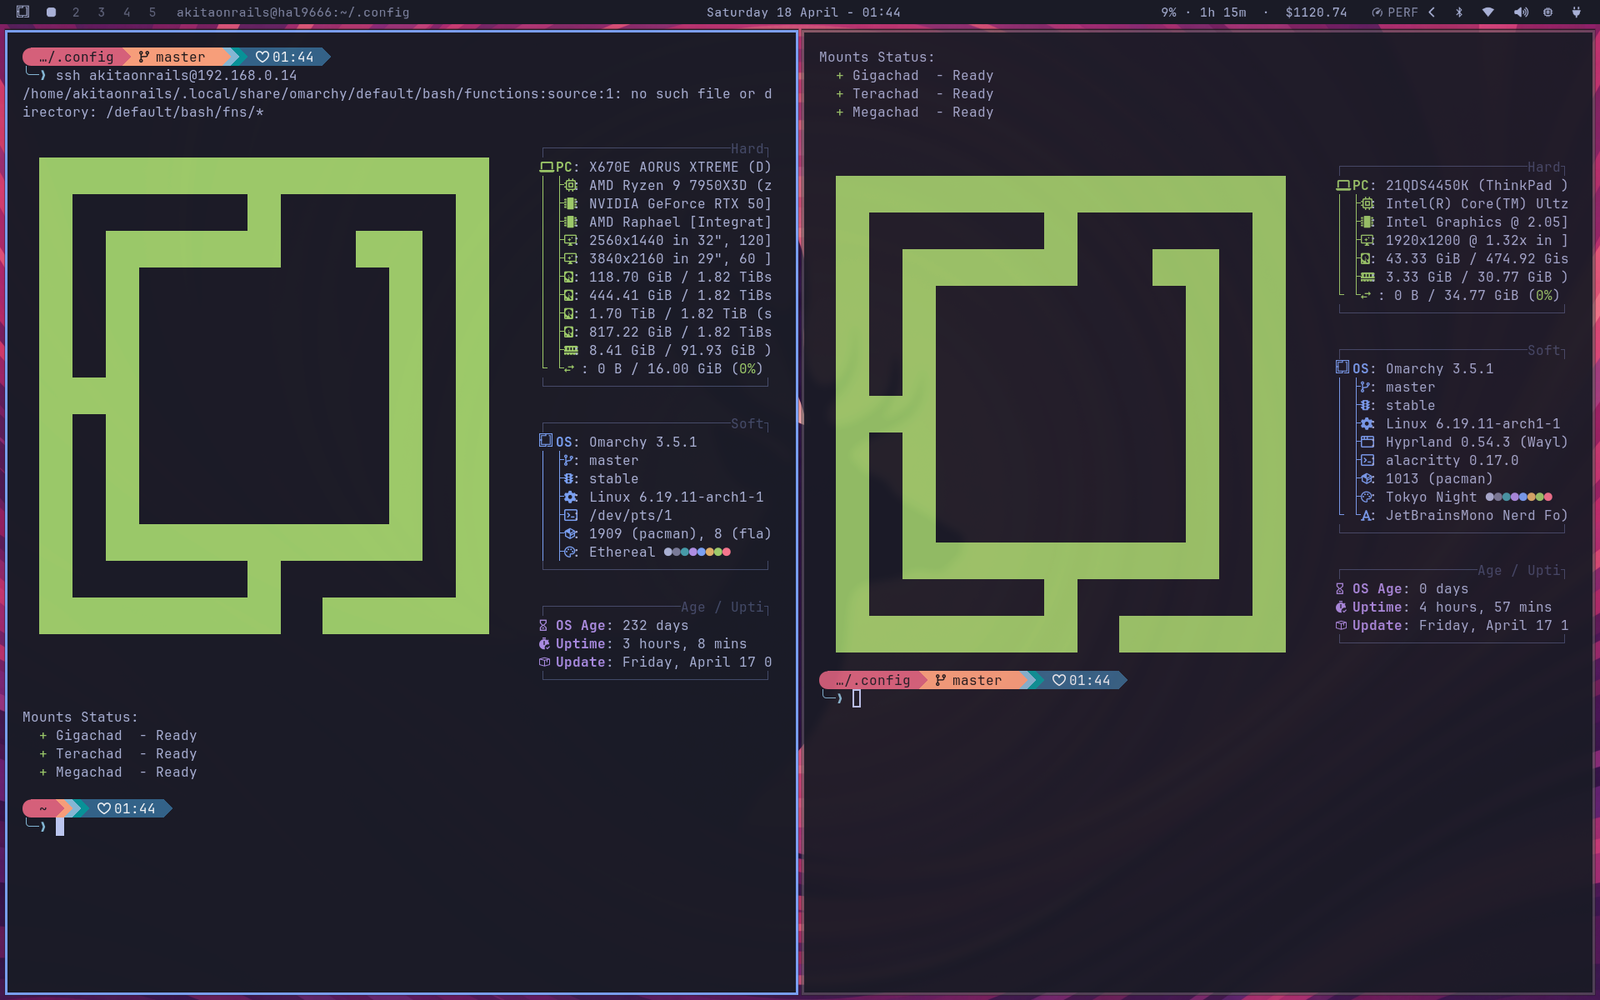
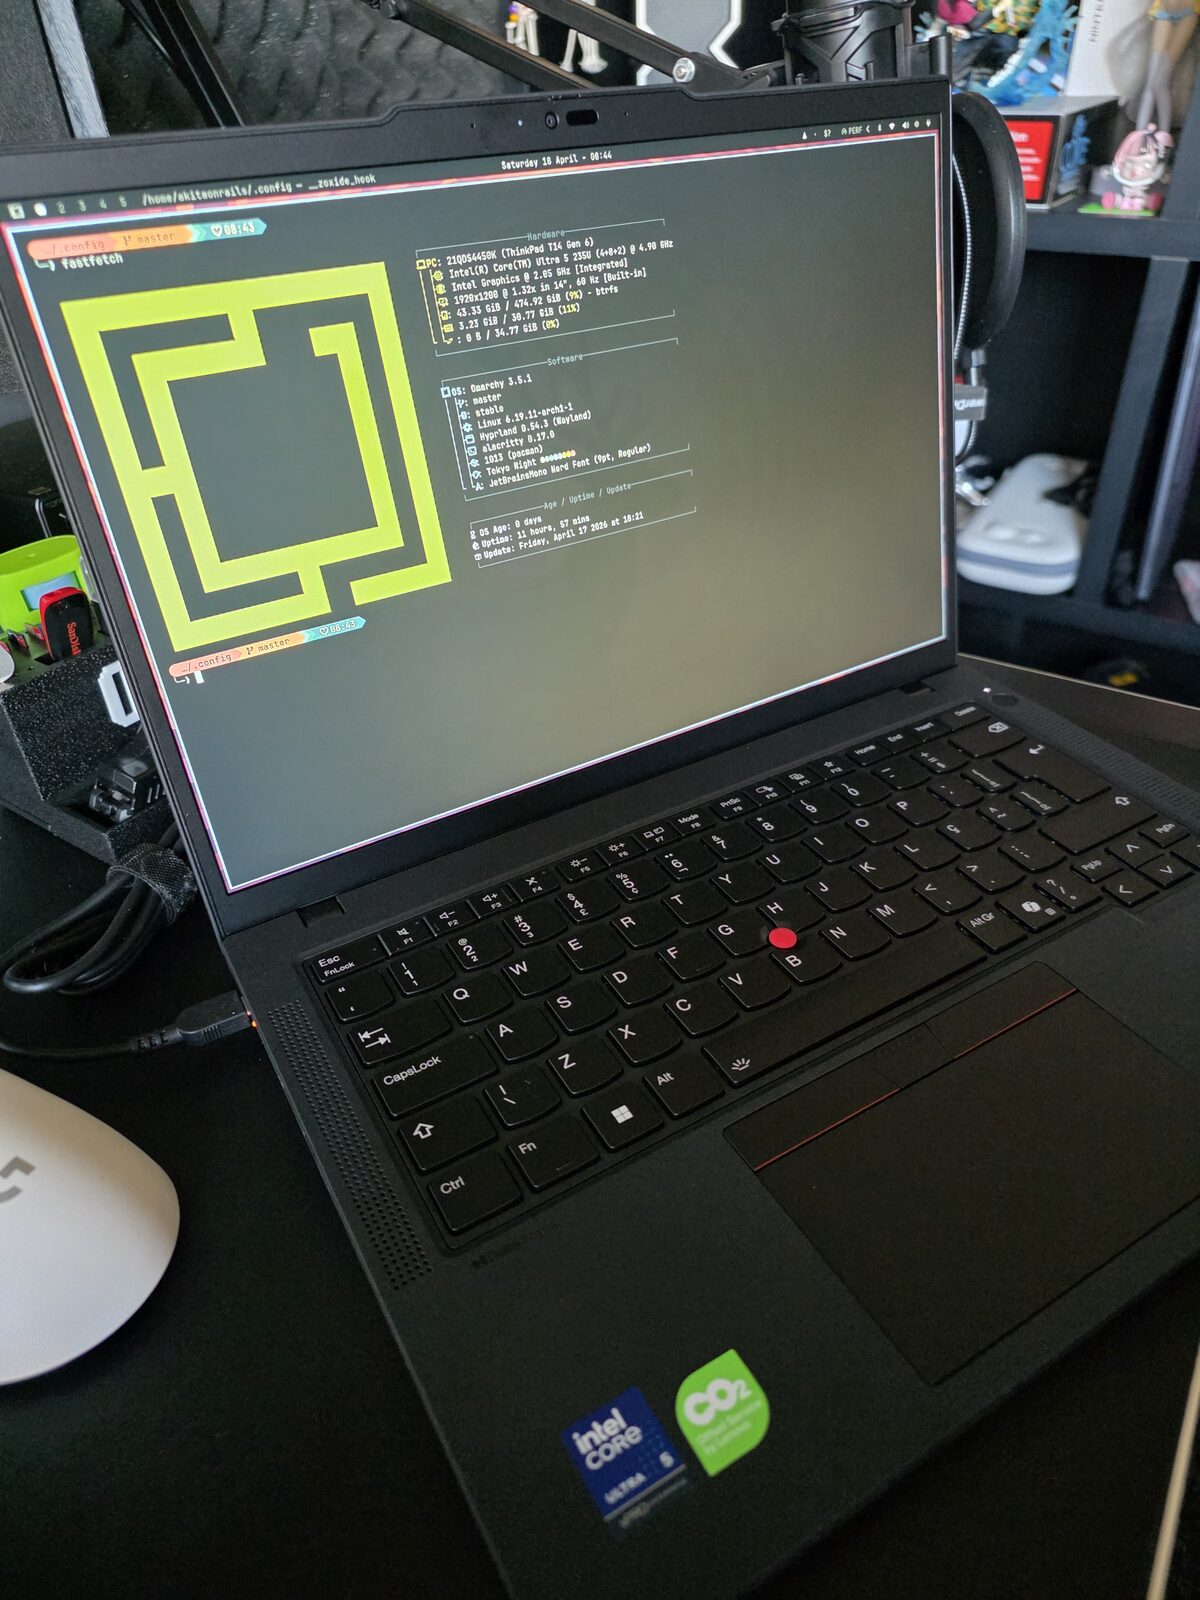
In practice it looks like this: open the notebook, split the Hyprland layout, left pane SSHs into the main desktop, right pane is the notebook itself. Same Omarchy on both, same keybindings, same bash. The notebook becomes an extension of the desktop, not a parallel environment I have to re-learn in my head every time I switch.
SSH from outside the house: Tailscale
Inside the local network, SSH is trivial, the notebook talks to the desktop through the internal IP. Outside the house is another story. My home IP is dynamic, opening port 22 to the internet is a terrible idea, and even with DDNS and port forwarding you’re putting SSH on the public internet for any scanner to find.
The solution I use is Tailscale. For those who don’t know: Tailscale is a mesh VPN built on WireGuard that creates a private network between your devices (the “tailnet”). Each machine runs the agent, authenticates once, and gets a fixed IP on the private network (something like 100.x.y.z). Traffic between your own devices goes peer-to-peer, encrypted by WireGuard. It doesn’t route through Tailscale’s central server, they only coordinate NAT traversal. Result: from my notebook in a café anywhere in the world, I run ssh hal9000 and land on my home desktop as if I were on the same network.
More sophisticated options exist: Cloudflare Tunnel with Zero Trust to expose services publicly with SSO auth, self-hosted headscale, raw WireGuard with manual config, Nebula, OpenVPN. Each has its use case. If you need to expose services to third parties, control granular per-identity access, or run the whole infrastructure at home without depending on anyone, those options win. In my case, it’s just notebook talking to desktop, for short periods (it’s not a full week of work, it’s a weekend debug session), so free Tailscale covers it. The free tier accepts up to 100 devices and 3 users, way more than I need.
Setup is as simple as it gets:
# On Arch/Omarchy
sudo pacman -S tailscale
sudo systemctl enable --now tailscaled.service
sudo tailscale up --ssh
The --ssh flag enables Tailscale SSH, which authenticates via tailnet identity instead of a local SSH key. Once you log in through the browser to tailscale, each registered machine can SSH into the others based on ACL policy defined in the admin panel. Zero key management.
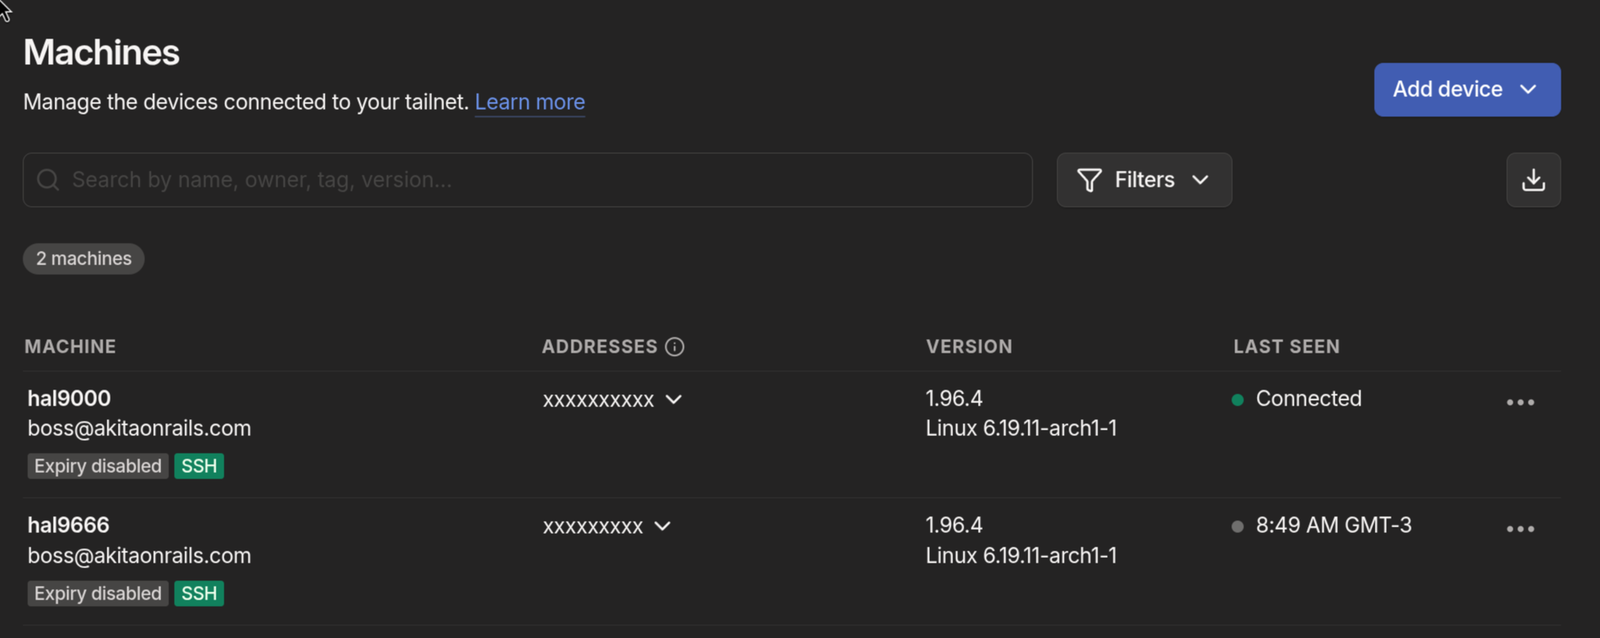
I repeat the same on the desktop, log in with the same account, done. Both machines show up in the panel (hal9000 and hal9666 in the screenshot above, both with SSH enabled). From the notebook: ssh hal9000. From the desktop to the notebook: ssh hal9666. No port forwarding, no public IP, no port 22 exposed to the internet. If the notebook is stolen, I remove it from the tailnet with one click.
A practical detail: since the tailnet gives stable names, I added entries to ~/.ssh/config to use these short names:
Host hal9000
  HostName hal9000
  User akitaonrails
Now ssh hal9000 works from anywhere that has Tailscale connected. It’s the closest thing to “it just works” I’ve seen for remote SSH.
Why not a Mac
I have no use for macOS. As a dev, I live better in native Linux. Every tool I need has a first-class Linux version, and on macOS I’d get a second-class version via Homebrew. I don’t do iOS, so I don’t need XCode. For mobile I use Flutter or Hotwire Native, which run on any OS. iTerm2 and Ghostty on Mac are fine, but Alacritty, Kitty and Ghostty itself on Linux work just as well. Every good piece of software lands on Linux first and gets ported afterwards. Arch with AUR covers everything in a single yay.
For creative work, I haven’t done it professionally in years. DaVinci Resolve Studio on Linux is better than Final Cut Pro. Krita or Affinity Photo replace Photoshop for most cases. Clip Studio Paint on Android is better than Procreate. I simply don’t have a workflow that depends on Apple, and the App Store annoys me.
For gaming, Mac is terrible. Apple Silicon has a decent GPU for some things, but the native macOS game library is pathetic compared to Windows or Linux. Game Porting Toolkit exists, CrossOver exists, but for anyone who games seriously, it doesn’t cut it. I won’t be gaming on the Thinkpad, I have the main desktop and the mini-PC with the RTX 4090 for that. But if I ever feel like running Hollow Knight or some indie on a train, I just install Steam and let Proton handle it. Linux became a real gaming platform in the last few years, with Proton/DXVK running almost the entire Steam catalog (check ProtonDB). I recently wrote about running my emulation library in distrobox without polluting the host system. With Mac, those options don’t exist.
Another argument that always shows up: “but a Mac Mini M4 or a Mac Studio with 128GB of unified memory runs large models locally, it’s a ChatGPT replacement.” I already tested that thesis and wrote a detailed benchmark. The conclusion: expensive local hardware to run LLMs is a weekend hobby, not a production tool. The open source models that fit don’t deliver the quality Claude Opus delivers. I have a home server with AMD Strix Halo and 96 GB of unified RAM, I ran models for dozens of hours, and in my real coding flow they’re fine for simple tasks. For complex tasks, Claude Opus. Before spending $4000 on a Mac Studio justifying it with local models, actually test it first. You’ll probably end up paying for Opus again.
Why Omarchy
I’ve been using Omarchy on the desktop for months and documented the path in a series of articles. Omarchy 2.0 has its own installer with LUKS, Btrfs, Limine, snapper and SDDM already configured. I wrote about using the official ISO, about ZSH customizations with atuin, starship, secrets properly organized, about Mise for multiple languages, about LazyVim and LazyExtras, about SSH and Yubikeys, about modern TUIs. There’s also Omarchy 3 with dual GPU AMD + NVIDIA and Crush as a coding agent.
For those who don’t know: Omarchy is plain Arch Linux with a cosmetic layer on top of Hyprland/Wayland. Pre-configured with sane defaults. I could build all of it from scratch, I’ve done it several times in my life, but why redo work someone already did well? I install Omarchy, I stack the tweaks that are mine on top, and I have customized Arch in a fraction of the time.
A point I raise every time I recommend Omarchy: the documentation is excellent. There’s an official manual covering everything from installation to theme customization, keybindings, Hyprland, Waybar, the works. If you’re coming from Ubuntu or Fedora and are wary of Arch, this manual handles most of the doubts. If you’ve never touched Hyprland, open it and read around. It’s not a README dumped on GitHub, it’s a real manual with chapters and an index.
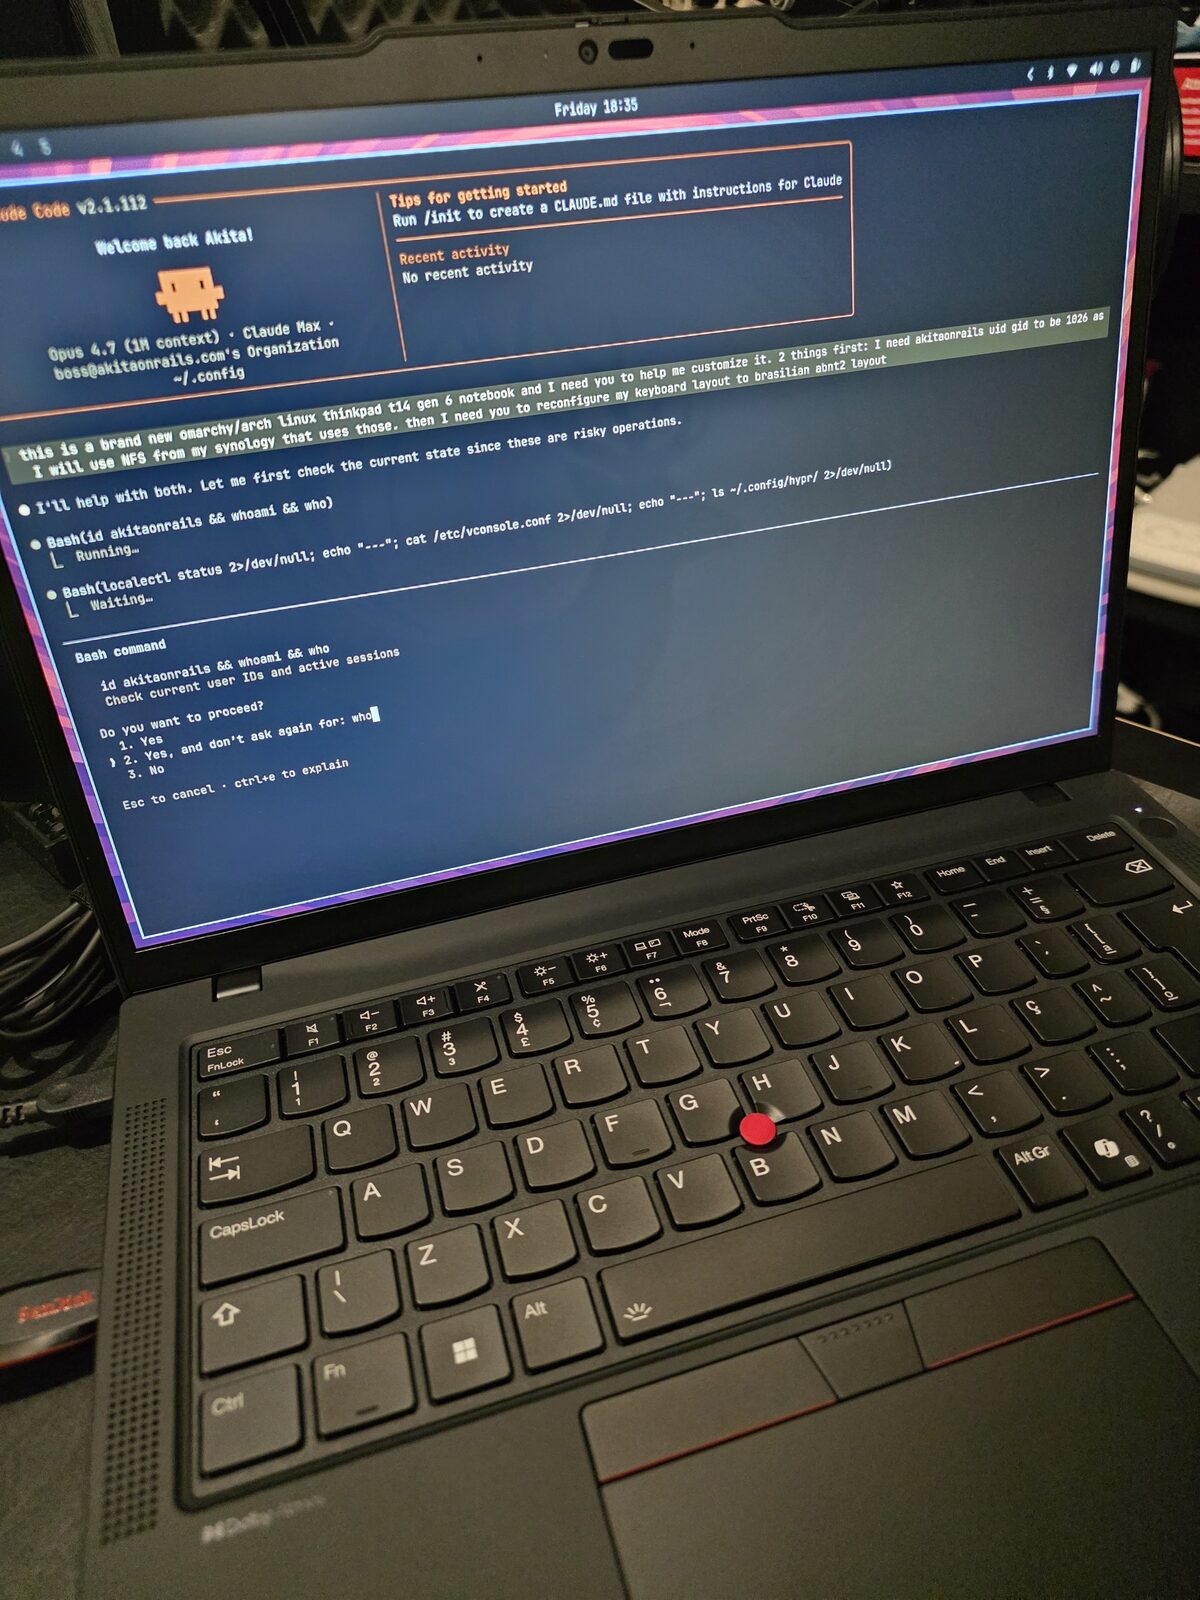
The story of this article starts in a previous thread. I recently migrated my home server, swapping an old Ubuntu box for a Minisforum MS-S1 running openSUSE MicroOS configured with Claude Code. That was the first serious experiment of letting Claude Code drive an entire infra migration, with containers, NFS, services, networking. It worked. And it left an idea in the air: why not use the same approach to configure a new notebook?
That’s what I did. I grabbed the Thinkpad, downloaded the latest Omarchy ISO, burned it to a flash drive, installed it over Windows. From zero to working desktop in under an hour. From there on, it’s all tweaking, which I documented as I went.
I’ll detail the two layers of customization: what any notebook needs, and what’s specific to this Thinkpad.
Laptop-specific configs
A notebook has problems a desktop doesn’t: battery, suspend, lid, brightness, trackpad. Those are the parts Omarchy default doesn’t cover the way I want.
Power management with TLP
Omarchy defaults to power-profiles-daemon. I swapped it for TLP, which gives granular control over CPU scaling, battery thresholds and dynamic profiles based on AC vs battery.
sudo pacman -S tlp tlp-rdw
sudo systemctl mask power-profiles-daemon.service
sudo systemctl enable --now tlp.service
The mask is necessary because upower pulls power-profiles-daemon back in if you just disable it.
Charge thresholds: 60% to start, 85% to stop. The notebook spends most of its time plugged in on the office desk, and keeping the battery at 100% 24/7 wrecks capacity over time. With 60/85, the battery spends most of its time in the healthy lithium range and still has decent usable capacity.
Profiles: balanced with balance_power on battery, performance on AC. TLP’s low-power was too aggressive on the Core Ultra 5 235U, window and terminal response became noticeable. Balanced gives the best consumption/responsiveness ratio for normal use.
There’s a gotcha: tlp auto after tlp ac doesn’t always re-apply the battery profile. I wrote a small script bound to Super+Ctrl+P that reads the current state and calls tlp bat or tlp ac explicitly:
#!/bin/bash
set -euo pipefail

profile=$(cat /sys/firmware/acpi/platform_profile 2>/dev/null || echo unknown)
on_ac=$(cat /sys/class/power_supply/AC*/online 2>/dev/null | head -1 || echo 0)

if [[ "$profile" == "performance" ]]; then
  if [[ "$on_ac" == "1" ]]; then
    sudo /usr/bin/tlp auto >/dev/null
    label="Plugged in — back to AC auto"
  else
    sudo /usr/bin/tlp bat >/dev/null
    label="On battery — normal profile"
  fi
  notify-send -t 2000 "Performance mode: off" "$label" 2>/dev/null || true
else
  sudo /usr/bin/tlp ac >/dev/null
  notify-send -t 2000 "Performance mode: on" "Forcing AC profile" 2>/dev/null || true
fi
In waybar, a custom module custom/perf shows the current state ( PERF, ECO, or empty for balanced) and accepts a click to toggle. The output script is tiny:
#!/bin/bash
p=$(cat /sys/firmware/acpi/platform_profile 2>/dev/null)
case "$p" in
performance) printf ' PERF' ;;
low-power) printf ' ECO' ;;
balanced|"") printf '' ;;
*) printf '%s' "$p" ;;
esacSuspend, hibernate, and the lid
This is what changed compared to the notebooks I used in 2015. The T14 Gen 6 closes the lid, suspends, and wakes up when you open it. No bug, no weird delay, no needing to log in again mid graphical session. Hyprlock kicks in after the suspend, accepts fingerprint or password, and brings me back to the desktop in seconds. This is the behavior Apple has had for years and that on Linux used to be an adventure. In 2026, on modern hardware with kernel 6.11+, it just works.
Mem sleep mode is s2idle (no deep sleep). Hibernation is enabled via a ~30 GB Btrfs swapfile and resume=/dev/mapper/root resume_offset=... on the Limine kernel cmdline. I rarely use it, but it’s there.
Hypridle has aggressive timeouts for a laptop:
- 2.5 min → screensaver
- 5 min → lock
- 5.5 min → DPMS off + keyboard backlight off
After lock, another 5 min and the screen turns off completely. On unlock, it restores screen and keyboard brightness to the previous level. These timings are much shorter than on the desktop (20-40 min there). The battery difference over a day is measurable.
Brightness and keyboard backlight
brightnessctl controls both. Fn+Space toggles the keyboard backlight across three levels. Hypridle saves the current level before turning off and restores it on resume. Command I use in the script:
brightnessctl -sd '*::kbd_backlight' set 0    # save and turn off
brightnessctl -rd '*::kbd_backlight'          # restore
Touchpad
In hypr/input.conf:
touchpad {
    natural_scroll = true
    clickfinger_behavior = true
    disable_while_typing = true
    scroll_factor = 0.4
}
gesture = 3, horizontal, workspace
clickfinger_behavior swaps the 2-finger click as right-click (more comfortable than hitting the lower-right zone). disable_while_typing is basic palm rejection. Three-finger horizontal swipes switch workspaces, the most useful gesture in Hyprland.
Thinkpad-specific configs
This is what’s specific to this model. Some things modern Linux handles on its own, others need explicit configuration.
Fingerprint sensor
Goodix MOC 27c6:6594, works with libfprint 1.94.9+ on kernel 6.11+. Package is fprintd.
sudo pacman -S fprintd
fprintd-enroll                        # right index finger by default
fprintd-enroll -f left-index-finger   # other finger
To make sudo accept fingerprint, I added auth sufficient pam_fprintd.so above the pam_unix.so line in /etc/pam.d/sudo. With sufficient, if the fingerprint passes, it authenticates directly. If it fails or I hit ESC, it falls back to the password prompt. This is genuinely worth it: dozens of times a day, sudo pacman -Syu or sudo systemctl restart something, and I just touch the sensor.
On hyprlock, I use hyprlock’s native configuration, not PAM:
auth {
    fingerprint {
        enabled = true
        ready_message = Scan fingerprint or type password
        present_message = Scanning...
        retry_delay = 250
    }
}
The PAM path gives a double prompt. Configured natively, hyprlock accepts fingerprint or password, whichever succeeds first unlocks.
On SDDM (initial login), I kept password only. The reason: the login password unlocks the GNOME keyring, and the fingerprint can’t provide plaintext for that. Once the keyring is unlocked, hyprlock can use fingerprint without issues.

In practice, sudo looks like that. Touch the sensor, authenticate, move on.
Brazilian Thinkpad keyboard
The Brazilian Thinkpad keyboard has an annoying quirk. The /? key sits where the right Ctrl would be (keycode 97), not in the traditional ABNT2 AB11 position (keycode 89). If you use the standard br(abnt2) layout, that key is inaccessible. It literally prints nothing.
The solution is the br(thinkpad) variant that exists in /usr/share/X11/xkb/symbols/br:
xkb_symbols "thinkpad" {
    include "br(abnt2)"
    name[Group1]="Portuguese (Brazil, IBM/Lenovo ThinkPad)";
    key <RCTL> { [ slash, question, degree, questiondown ] };
};
In hypr/input.conf:
kb_layout = br
kb_variant = thinkpad
kb_model = thinkpad60
And system-wide for TTY/X11:
sudo localectl set-keymap br-abnt2
sudo localectl set-x11-keymap br thinkpad thinkpad60
I wrote a small Python that reads raw scancodes from /dev/input/event* to diagnose these quirks. Useful when a key decides not to work and you need to find out if it’s hardware, kernel, or xkb.
Input method: fcitx5
Alongside the layout I install fcitx5. Input method, for those who don’t know, is the layer that turns a key sequence into characters. It handles deadkeys (tilde for nasalization, acute accent, circumflex), composing characters that aren’t on the keyboard (ç, Ç, uppercase accented letters), emoji support. In Qt or GTK apps, the input method also drives context menus for cedilla and accents.
Packages:
sudo pacman -S --needed fcitx5 fcitx5-configtool fcitx5-gtk fcitx5-qtAnd the environment variables for toolkits to find fcitx5. I created ~/.config/environment.d/fcitx.conf:
INPUT_METHOD=fcitx
QT_IM_MODULE=fcitx
XMODIFIERS=@im=fcitx
SDL_IM_MODULE=fcitx
systemd’s environment.d is loaded before graphical sessions, so Brave, Alacritty, VS Code and any GTK/Qt app pick it up automatically. I enable autostart in Hyprland:
exec-once = fcitx5 -dTyping ~a produces ã, 'e produces é, ç works as it should in every app. On a Brazilian Thinkpad keyboard, this is the difference between typing Portuguese naturally or hunting for each character.
SOF audio
Realtek ALC3306/ALC287 codec via Sound Open Firmware. Without sof-firmware, the kernel module loads but the DSP never boots and PipeWire silently falls back to auto_null. Result: you think the speaker is on mute, but actually PipeWire has no device at all.
sudo pacman -S --needed sof-firmware alsa-ucm-conf pipewire pipewire-pulse wireplumberIf you need to force SOF instead of legacy HDA:
echo "options snd-intel-dspcfg dsp_driver=3" | sudo tee /etc/modprobe.d/alsa.confReload without reboot:
sudo modprobe -r snd_sof_pci_intel_mtl
sudo modprobe snd_sof_pci_intel_mtl
systemctl --user restart wireplumber pipewire pipewire-pulse
Firmware updates via fwupd
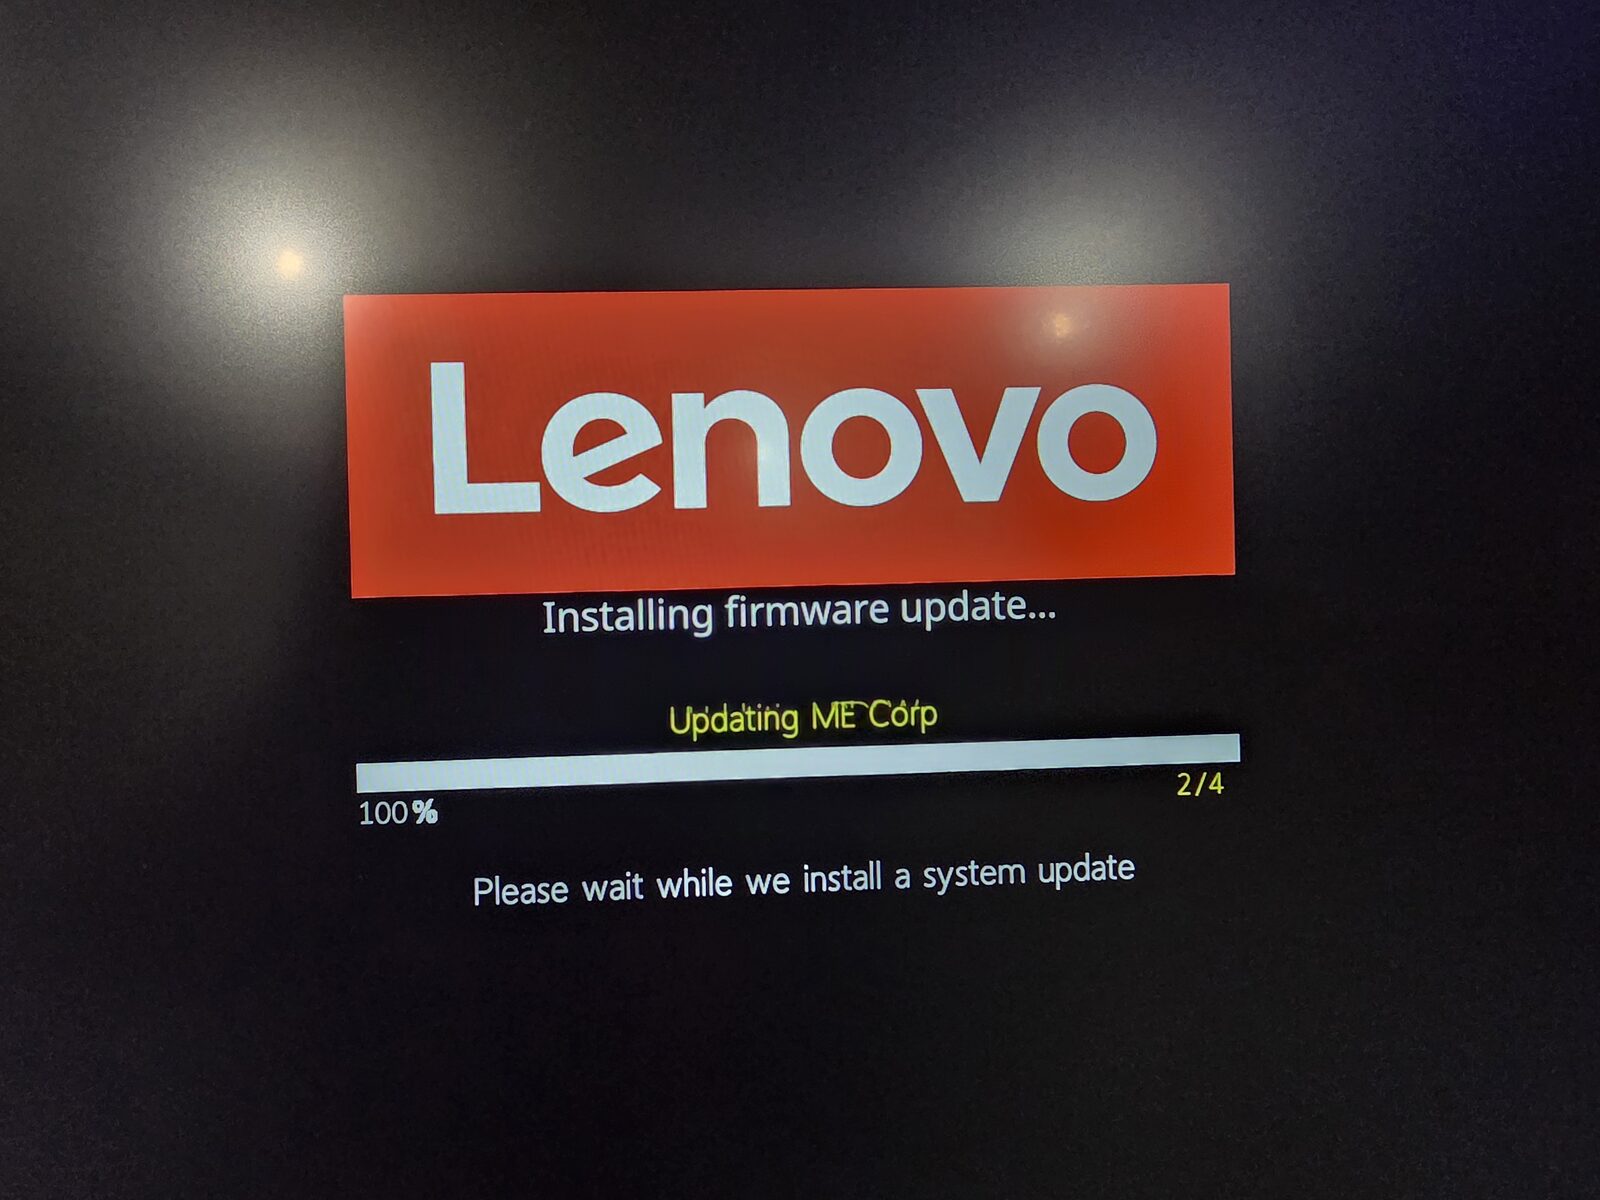
fwupdmgr update works, but with Limine there’s a gotcha: fwupd tries to write to /boot/EFI/systemd/ or /boot/EFI/arch/, which don’t exist. The workaround:
sudo mkdir -p /boot/EFI/arch
sudo fwupdmgr update -y --no-reboot-check
fwupdmgr get-history  # should show "Success"
HiDPI / fractional scaling
14" panel at 1920x1200, Hyprland’s free resolution. Omarchy’s auto 1.5x felt too chunky. I pinned it at 1.333x:
env = GDK_SCALE,1
monitor=,preferred,auto,1.3333,vrr,2
Effective 1440x900. GTK with GDK_SCALE=1 renders 1:1 with Hyprland (no double magnification). VRR mode 2 only in fullscreen, because LCD panels tend to flicker on static content with VRR active.
Brave and Chromium flags to render well at this scale:
--ozone-platform=wayland
--enable-features=WaylandFractionalScaleV1,UseOzonePlatform,VaapiVideoDecoder,VaapiVideoEncoder
--enable-gpu-rasterization
VAAPI makes a real difference on YouTube battery life.
Tuning Omarchy to be mine
Omarchy comes with good defaults. What I adjust stacks on top of them, without touching ~/.local/share/omarchy/ (which is clobbered by omarchy-update). All customization lives in ~/.config/.
Infra: Btrfs, snapshots, Snapper
Omarchy already ships with Btrfs and separate subvolumes:
| Subvolume | Mount | In snapshots? |
|---|---|---|
@ | / | yes |
@home | /home | no |
@log | /var/log | no |
@pkg | /var/cache/pacman/pkg | no |
@home separated means ~/.cache, ~/.config/BraveSoftware, etc. don’t bloat root snapshots. Snapshot is for system, not profile.
Swap: 4 GB zram at priority 100 (hit first), plus a 30 GB swapfile at priority 0 (enables hibernation, sized to match RAM).
The snapshot stack: Snapper takes a snapshot before and after every pacman -Syu via snap-pac. limine-snapper-sync writes those snapshots into the Limine menu, so you can boot into a previous snapshot to roll back. If something breaks after an update, you hold a key on boot, pick the pre-update snapshot, boot read-only to verify, and if it’s good, run snapper rollback.

Omarchy leaves snapper-cleanup.timer and snapper-boot.timer disabled by default. I enabled both and configured retention to fit on a 1 TB SSD without blowing up:
TIMELINE_LIMIT_HOURLY=10
TIMELINE_LIMIT_DAILY=0
TIMELINE_LIMIT_WEEKLY=1
TIMELINE_LIMIT_MONTHLY=1
NUMBER_LIMIT=50
A detail that costs debug time if you forget: Docker and Ollama write gigabytes into /var/lib/docker and /var/lib/ollama. If that falls inside @, snapshots go catastrophic. Each Docker image or Ollama model downloaded triples in size. I created nested subvolumes for both, with chattr +C to disable CoW:
sudo btrfs subvolume create /var/lib/docker
sudo chattr +C /var/lib/docker
sudo btrfs subvolume create /var/lib/ollama
This has to be done BEFORE Docker or Ollama writes any data. If they already have data there, you need to migrate.
NFS to the Synology NAS
My Synology exposes three volumes. On the desktop, I mount them the usual way. On the notebook, it has to be more defensive. The notebook moves around, forgets networks, connects to public WiFi. Notebook’s fstab:
nfs4 _netdev,noauto,nofail,x-systemd.automount,x-systemd.idle-timeout=10min,x-systemd.mount-timeout=15s,noatime,nodiratime,nconnect=4,actimeo=10,soft,timeo=30,retrans=2Critical difference vs the desktop: soft with short timeouts (doesn’t hang forever), x-systemd.idle-timeout=10min (auto-unmount when idle), no network-online.target in the require (doesn’t slow boot). Practical result: cd /mnt/gigachad at home mounts lazily, away from home it fails fast without locking the shell.
Another important detail: my user on the notebook has UID 1026, which matches the share permissions on the Synology. Linux defaults to creating users at 1000, the Synology enforces identity via UID on the wire. If the UIDs don’t match, you can’t read the files, or worse, you write as nobody. I ran the usermod/groupmod from a TTY (with the user logged out) to remap the user to 1026/1026 and did chown -R on /home.
Public WiFi hardening
The notebook will leave the house. In an airport or café, I don’t want to announce hostname, don’t want a trackable MAC, don’t want a service listening on an open port.
/etc/NetworkManager/conf.d/00-macrandomize.conf:
[device]
wifi.scan-rand-mac-address=yes

[connection]
wifi.cloned-mac-address=stable
ethernet.cloned-mac-address=stable
connection.stable-id=${CONNECTION}/${BOOT}

ipv6.ip6-privacy=2
ipv6.addr-gen-mode=stable-privacy
Random MAC per scan (passive anti-fingerprinting). Stable cloned MAC per SSID (captive portals don’t re-prompt you every time) but different MACs between networks. IPv6 with temporary addresses and interface ID derived from a stable secret, not from the MAC (no EUI-64 leak).
/etc/systemd/resolved.conf.d/hardening.conf:
[Resolve]
LLMNR=no
MulticastDNS=no
Kills hostname broadcast on LLMNR and mDNS. I also disable avahi:
sudo systemctl disable --now avahi-daemon.service avahi-daemon.socketUFW firewall:
sudo ufw default deny incoming
sudo ufw default allow outgoing
sudo ufw --force enable
SSH server is already off by default on Omarchy. Nothing listening. Even if the firewall leaks, there’s no surface.
All of it rolls into a single initial setup ritual.
SSH agent persistence (keyring + keychain)
If you use SSH seriously, you want to type the passphrase once per boot and have ssh, git push, scp stay silent for the rest of the day. On current Arch there’s a catch: gnome-keyring 50 dropped its SSH component, and the replacement (gcr-ssh-agent) is a plain in-memory agent with no passphrase persistence. The “remember this key” checkbox you saw in old guides simply doesn’t exist anymore.
The combination that works has three pieces:
gcr-ssh-agent.socketmanaged by systemd servesSSH_AUTH_SOCKat$XDG_RUNTIME_DIR/gcr/sshpam_gnome_keyringon SDDM login unlocks the keyring with the login password (used by GUI apps like Brave, not by SSH)keychain(wrapper) keeps anssh-agentalive across logouts, overridesSSH_AUTH_SOCKto point at that persistent agent, and caches the PID in~/.keychain/<host>-sh
First, install the keyring:
sudo pacman -S --needed gnome-keyring seahorse keychainThen edit /etc/pam.d/sddm so the login password unlocks the keyring automatically. Add at the top:
-auth optional pam_gnome_keyring.soAnd at the end:
-session optional pam_gnome_keyring.so auto_startThe leading hyphen (-auth, -session) marks it optional, so if the module fails to load, login doesn’t break.
Pin SSH_AUTH_SOCK for graphical and TTY sessions via ~/.config/environment.d/ssh-agent.conf:
SSH_AUTH_SOCK=%t/gcr/ssh%t resolves to $XDG_RUNTIME_DIR, something like /run/user/1026. Enable the gcr socket and user linger (so user daemons survive logout):
systemctl --user enable --now gcr-ssh-agent.socket
sudo loginctl enable-linger $USER
Finally, in ~/.config/bash/init.sh, keychain starts or reuses the agent:
if command -v keychain &>/dev/null && [[ -r ~/.ssh/id_ed25519 ]]; then
  eval "$(keychain --eval --quiet ~/.ssh/id_ed25519)"
fi
--eval emits shell assignments (SSH_AUTH_SOCK, SSH_AGENT_PID) pointing to keychain’s agent, overriding the gcr path set by environment.d. --quiet silences the banner once the key is loaded.
Flow in practice: boot → first terminal → keychain prompts for the passphrase once → key stays loaded. Logout → login again → new shells reattach to the same agent (via ~/.keychain/<host>-sh) → zero prompts. ssh-add -l confirms the key is there, echo $SSH_AUTH_SOCK confirms it’s at keychain’s path.
When you’ll re-enter the passphrase: reboot, ssh-add -D, or keychain --clear. In normal use, once a day.
Bash instead of ZSH
On the desktop I use ZSH. On the notebook I went with Bash to align with Omarchy’s default, without having to maintain a parallel stack of modular layers. ~/.bashrc is a symlink to ~/.config/bash/bashrc, which sources Omarchy’s defaults first and then stacks my customizations:
source ~/.local/share/omarchy/default/bash/rc
source ~/.config/bash/envs.sh
source ~/.config/bash/aliases.sh
source ~/.config/bash/mounts.sh
source ~/.config/bash/init.sh
source ~/.config/bash/secrets    # gitignored, chmod 600
envs.sh has what’s mine: OpenRouter base URL, Ollama pointing to the LAN GPU box (192.168.0.14), AWS region, Hugo analytics, zoxide and SSH agent configs. aliases.sh has TLP shortcuts, an alias for shell-gpt via Docker, and functions to harden PATH when running makepkg or yay (prevents binary injection via a malicious user config).
init.sh does the integration work. Atuin with a manual bind for Ctrl-R (so the up arrow keeps bash’s default history-search, which I use more). Keychain loading ~/.ssh/id_ed25519 once per boot and reusing it across shells (no need to re-authenticate SSH every time). Blesh if installed (ZSH-style autosuggestions for Bash). And a function that has PROMPT_COMMAND set the window title to the current pwd and the running command:
__title_idle() { printf '\033]2;%s\007' "${PWD/#$HOME/~}"; }
__title_busy() {
  local cmd="${BASH_COMMAND}"
  [[ "$cmd" == "__title_"* || "$cmd" == *"PROMPT_COMMAND"* ]] && return
  printf '\033]2;%s — %s\007' "${PWD/#$HOME/~}" "$cmd"
}
if [[ -n "${PROMPT_COMMAND-}" ]]; then
  PROMPT_COMMAND="__title_idle; ${PROMPT_COMMAND}"
else
  PROMPT_COMMAND="__title_idle"
fi
trap '__title_busy' DEBUG
Idle, the title shows just the pwd. With a command running, trap DEBUG catches the BASH_COMMAND and updates the title. Waybar’s hyprland/window picks that up and displays it.
For the modern Rust toolbelt, the list:
sudo pacman -S --needed \
  eza bat fd ripgrep sd git-delta dust procs bottom duf tokei hyperfine \
  zoxide atuin tldr starship
eza replaces ls. bat replaces cat with syntax highlighting. fd replaces find. ripgrep replaces grep. sd replaces sed. delta plugs into git for colored side-by-side diff. dust for visual du. procs for ps. btm (bottom) for top. duf for df. tokei counts lines of code. hyperfine for command benchmarking. zoxide is cd with memory (very useful). atuin is shell history with encrypted sync (I point it to my home server via sync_address = "http://192.168.0.90:8888"). starship is the prompt. tldr is a man page in 10 lines.
The atuin key has to be backed up offline. If you lose it, you lose the encrypted history. I saved mine in my self-hosted Bitwarden (Vaultwarden), documented in the Bitwarden self-hosted article.
Git pipes diff through delta:
[core]        pager = delta
[interactive] diffFilter = delta --color-only
[delta]       navigate side-by-side line-numbers hyperlinks, light=false
[merge]       conflictstyle = zdiff3
Hyprland and Waybar
Visual and UX customizations on top of the default.
In hypr/looknfeel.conf, smaller gaps (2/5 vs the default 5/10), slide animation between workspaces, VFR on (reduces consumption when the screen is static), allow_session_lock_restore (if hyprlock crashes, it goes back to the lock screen instead of dumping you on the desktop).
In hypr/bindings.conf:
| Binding | Action |
|---|---|
Super+B | Brave |
Super+L | Lock screen (default was layout toggle) |
Super+Ctrl+L | Layout toggle (moved here) |
Super+Ctrl+P | Toggle TLP perf mode |
On Waybar, three custom modules I recommend:
Window title: the hyprland/window module shows what’s focused. In bash, PROMPT_COMMAND updates the title to something like “~/Projects/blog — hugo server”. So in waybar the directory and running command show up, without me needing to look at the terminal.


"hyprland/window": {
    "format": "{title}",
    "max-length": 50,
    "rewrite": { "(.{47}).+": "$1…" }
}
Perf mode: custom/perf runs a script that reads TLP state and shows an icon:
"custom/perf": {
    "exec": "~/.config/scripts/perf-waybar.sh",
    "interval": 3,
    "format": "{}",
    "on-click": "~/.config/scripts/perf-toggle.sh"
}
Empty for balanced, PERF for performance, ECO for low-power. Click toggles. Useful to quickly see what mode the machine is in.
Claudebar: I integrated claudebar as a custom module that shows the Claude Code session usage % and extra spend inline in waybar. No need to open another window.

The clock:
"clock": {
    "format": "{:L%A %d %B - %H:%M}",
    "format-alt": "{:L%A W%V %Y - %H:%M}"
}
Shows “Thursday 17 April - 14:32” by default, click toggles to “Thursday W16 2026 - 14:32” with the ISO week number, useful for planning articles and tasks.

Self-hosted Atuin
Atuin runs on my home server at 192.168.0.90:8888. I made a separate account for the notebook (akitaonrails-thinkpad), I don’t mix history with the desktop on purpose. atuin sync runs every 5 minutes and all history is encrypted before going to the server. The server doesn’t see the commands, only encrypted bytes.
Conclusion: picking a notebook for Linux
One thing I learned on this journey: picking a notebook to run Linux comfortably is not trivial. You have to check the ArchWiki for your specific model before buying. The T14s Gen 6 AMD page, for example, catalogs every hardware quirk and how to work around it. Without that reference, you discover the problems during install.
Rule I follow: never buy a freshly-released model. Let 6 to 12 months go by after launch. That gives the community time to iron out bugs, drivers to land mainline, the ArchWiki to have a decent page, libfprint to include the fingerprint sensor, and the kernel to cover WiFi and the IR camera. Buying on day one means signing up as a beta tester.
Brands with a decent Linux track record: Lenovo (especially Thinkpad, they ship Ubuntu and Fedora pre-loaded), Dell (the XPS and Latitude lines), Asus (Zenbook and ROG have reasonable support), Framework (built for Linux from the factory). Any recent Mac is cut off from Linux mainline or runs through Asahi with caveats.
The Thinkpad T14 Gen 6 isn’t the prettiest notebook I could have bought. But it’s rugged, it has the right ports, the fingerprint sensor works, and the plastic shell lets it fall, get scratched, travel in a backpack without making me nervous. To serve as a remote debug companion, it’s what I needed. If that’s your use case too, I recommend it. If you want OLED and metal, go Zenbook or T14s. Every premium comes with a compromise, no Linux notebook in 2026 is perfect.
Everything I described here is versioned in a private repo of mine. If I need to reinstall tomorrow, I run half a dozen steps in order and I’m back at the same place. That’s the whole point of keeping config in Git: notebook is commodity, config is mine.