Protecting Your Home Server with Cloudflare Zero Trust
In the previous post I explain how I registered a real domain at Cloudflare and created secure encrypted tunnels that let me reach my home server even from outside the house, without exposing ports on the router or anything like that.
This way I can access https://portainer.fabioakita.dev (fake example domain) from my phone on 5G, and it hits the portainer Docker container sitting on my LAN at http://192.168.0.200:9000, which was previously only reachable from home. All through a secure tunnel.
Note that I keep saying I’m using fake example domains and IPs throughout these posts, because I don’t want to expose the real domain.
Just by sitting behind a Cloudflare secure tunnel, I’m already under several layers of protection like DDoS defense and many other well-known attack mitigations. And although I take care to configure every service with a strong, random, unique password per service, the risk isn’t zero that someone could find my services and try to brute-force them, or exploit some zero-day vulnerability in one of the many services like Prowlarr, Sonarr, and friends.
So I’m still at the mercy of undiscovered bugs that might pop up out of nowhere, particularly on each service’s login screen or API endpoints.
To avoid that risk, there’s another Cloudflare product worth configuring: Zero Trust. The idea is simple: add a new login layer on top of everything, from Cloudflare itself, to protect each service. That way, someone has to break Cloudflare before they even get a chance to try breaking one of my services.
1. Sign up for the service
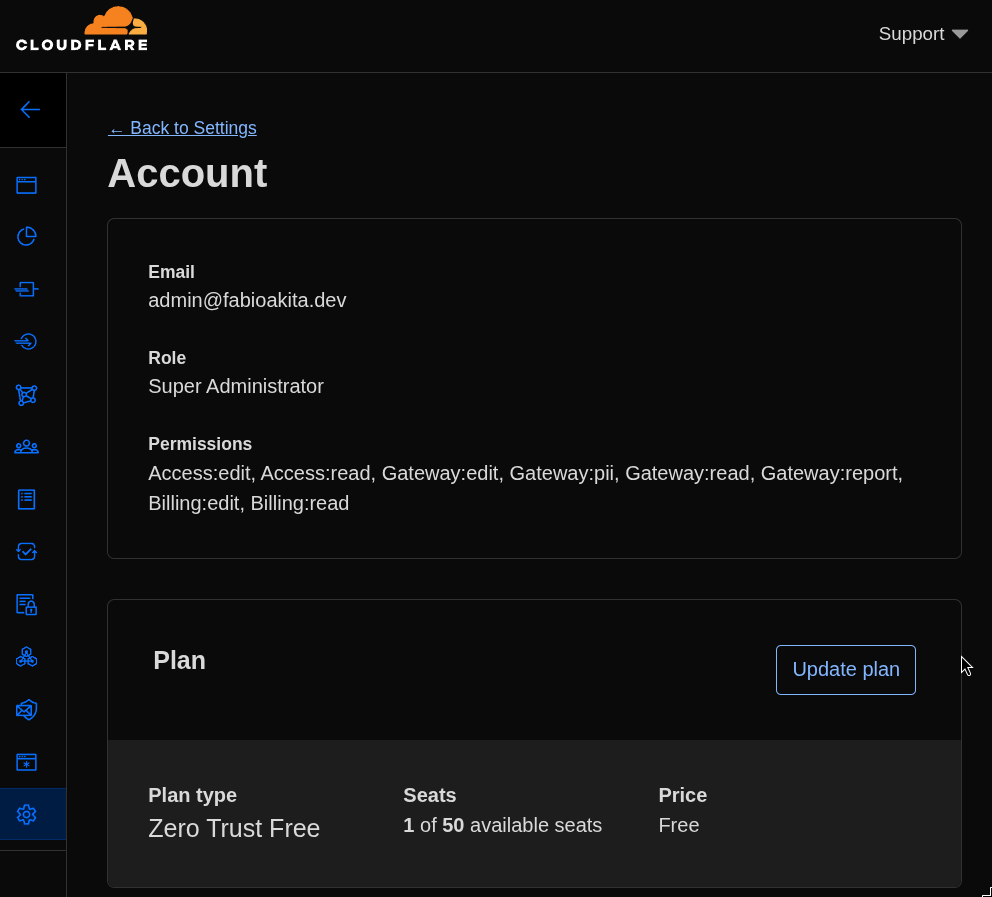
This is the easy part. For few services and few users (just me), there’s a free plan, just sign up:
2. Create OAuth Credentials in Google Cloud
Since I pay for Google Workspace, I decided to use integrated login with Google OAuth, but it can be any other provider, pick whatever you prefer. For this I need to go to my Google Cloud console and enter the API & Services section. Here we create credentials for an OAuth client ID and configure it like this:
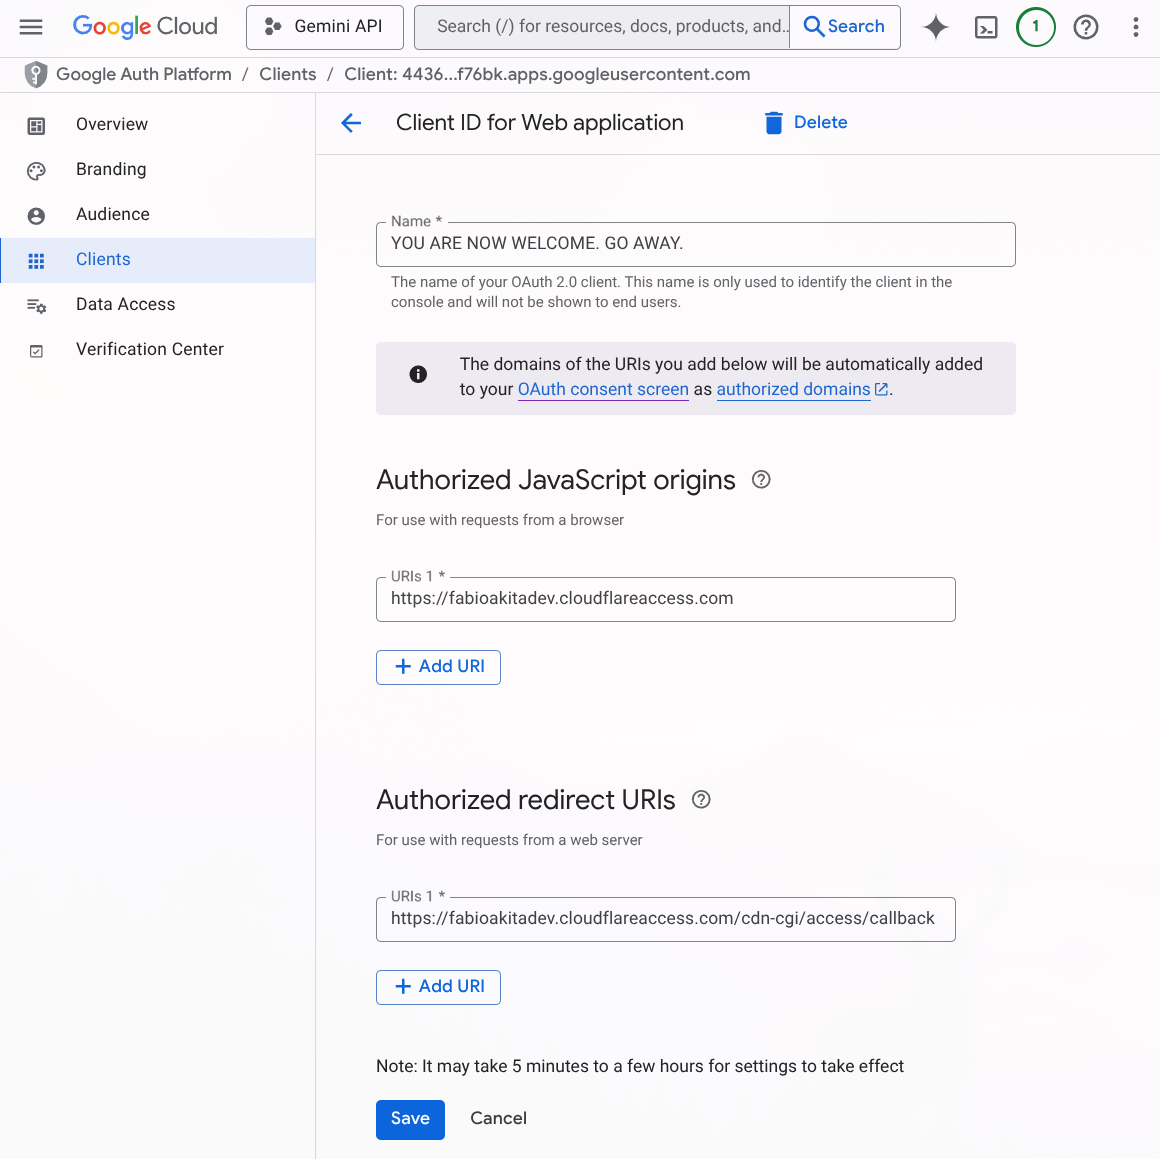
The name doesn’t matter, it’s what shows up on the login screen. What matters are the Javascript Origins fields, which must follow this format:
https://<your-team-name>.cloudflareaccess.comAnd the redirect URIs field, which is where Google’s login screen will redirect to, and it has to point back to our Cloudflare:
https://<your-team-name>.cloudflareaccess.com/cdn-cgi/access/callbackOnce that’s done, it gives you the option to download a JSON file with the metadata and secret. What’s important is that at the end it gives you an OAuth Client ID, which is a URL in the format xxxxxx.apps.googleusercontent.com, and most importantly, a Client Secret, which you should store in BitWarden or another secure place.
4. Creating a Login Method in Zero Trust
Now back to the Zero Trust console on Cloudflare, click “Settings” at the bottom of the menu, enter “Authentication”, and create a new Login Method:
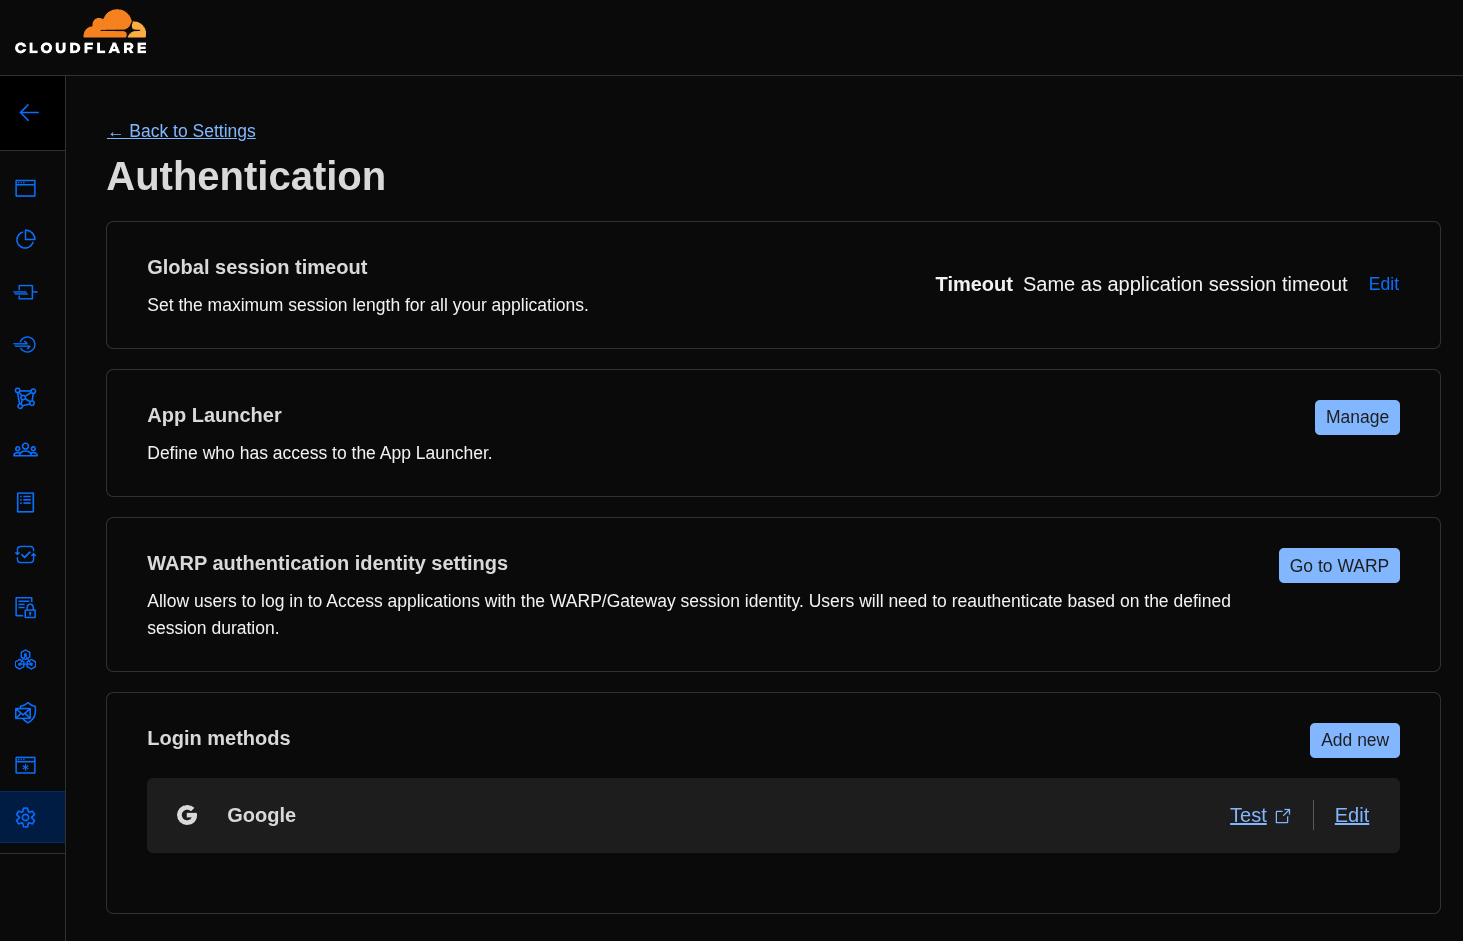
After clicking “Add new”, just fill in the data we brought from Google Cloud:

Again, use whatever name you want, paste the OAuth Client ID as “App ID” and the Client Secret, and that’s it, now we have Google OAuth integrated as a login method in our Zero Trust.
5. Creating Policies
Now comes the part where I’m not sure if I did it entirely right. If I didn’t, let me know in the comments below!
My understanding is that we need to create at least two Policies, one for Service Auth and another for the Email I want to allow coming in from Google.

To continue, just click “Add a Policy” and edit the first policy:
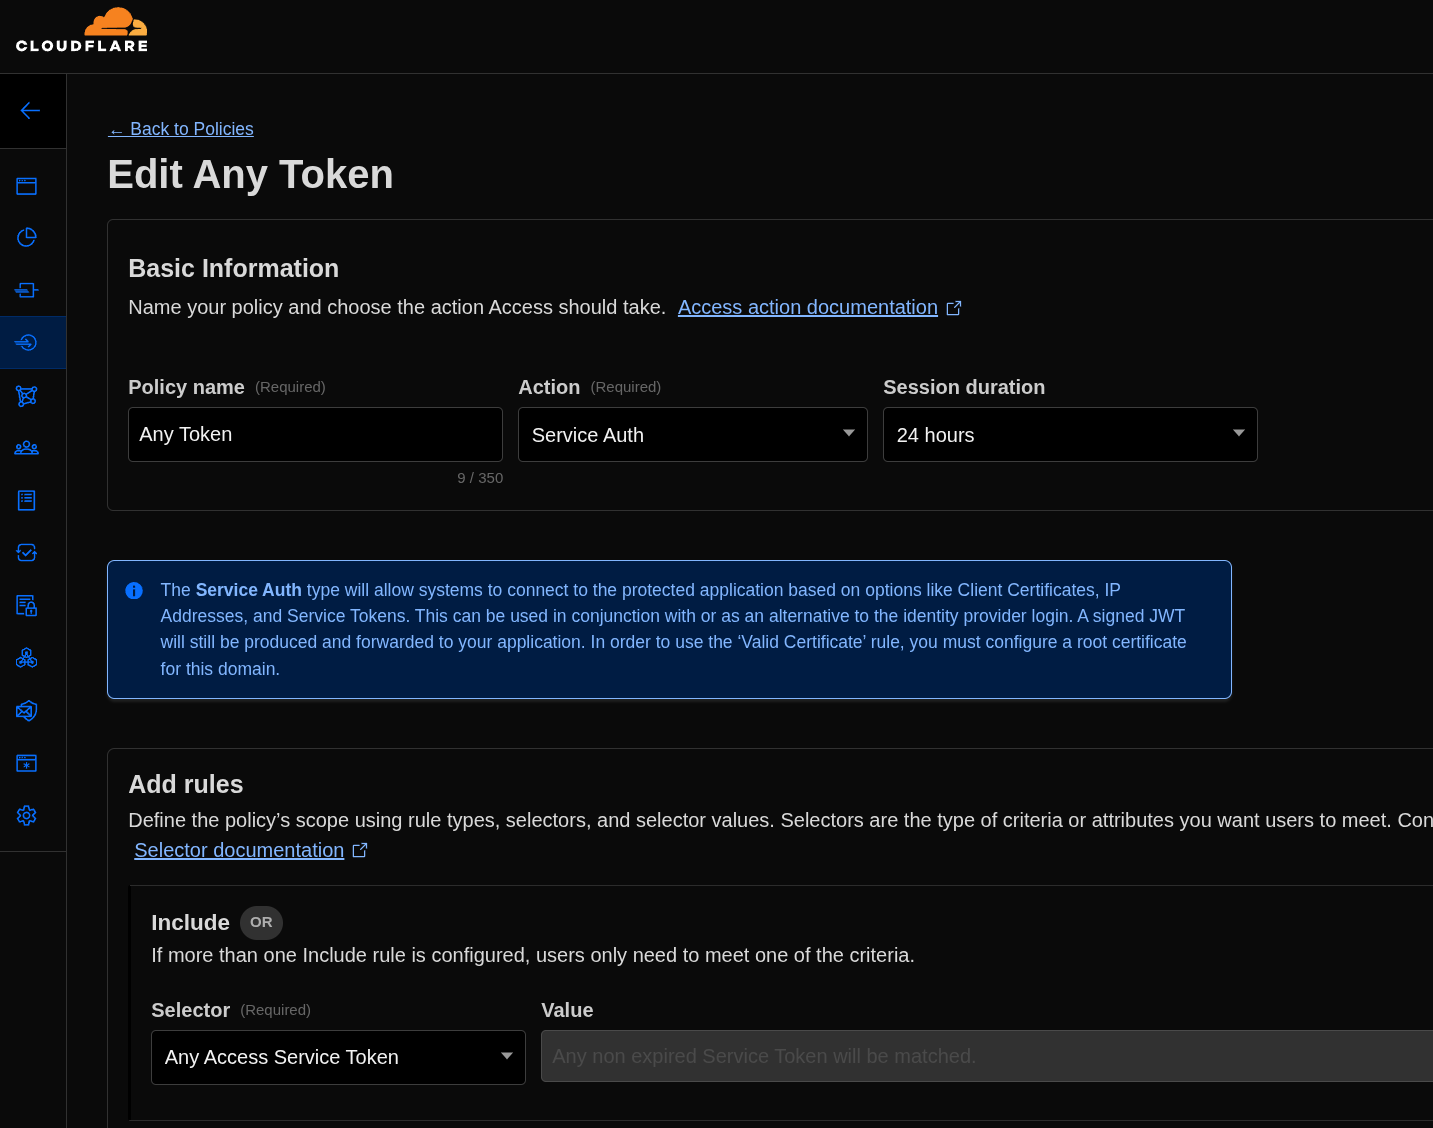
The name can be anything. What matters is that under “Action” you pick “Service Auth” and under “Add Rules” you pick Any Access Service Token (this is the part I think is wrong, but I couldn’t find a better option - I didn’t quite understand how Service Token works).
Now we need to create the second policy like this:
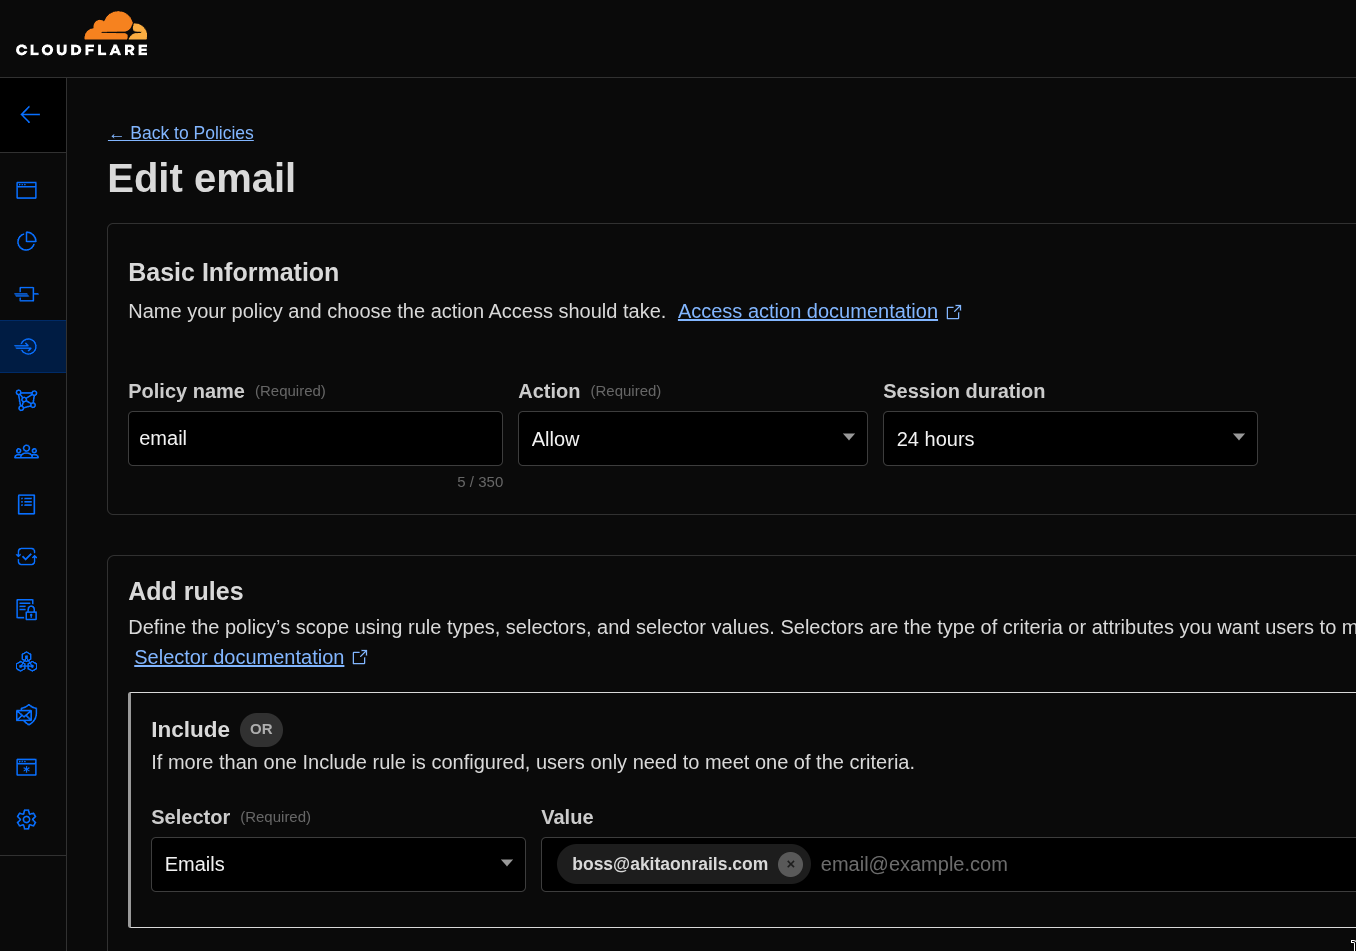
This time what matters is having “Action” as “Allow” and adding the Rule “Emails”, picking the email you want to authenticate. In my case, just me.
6. Creating a new Application
Now we can create a new application in Zero Trust:
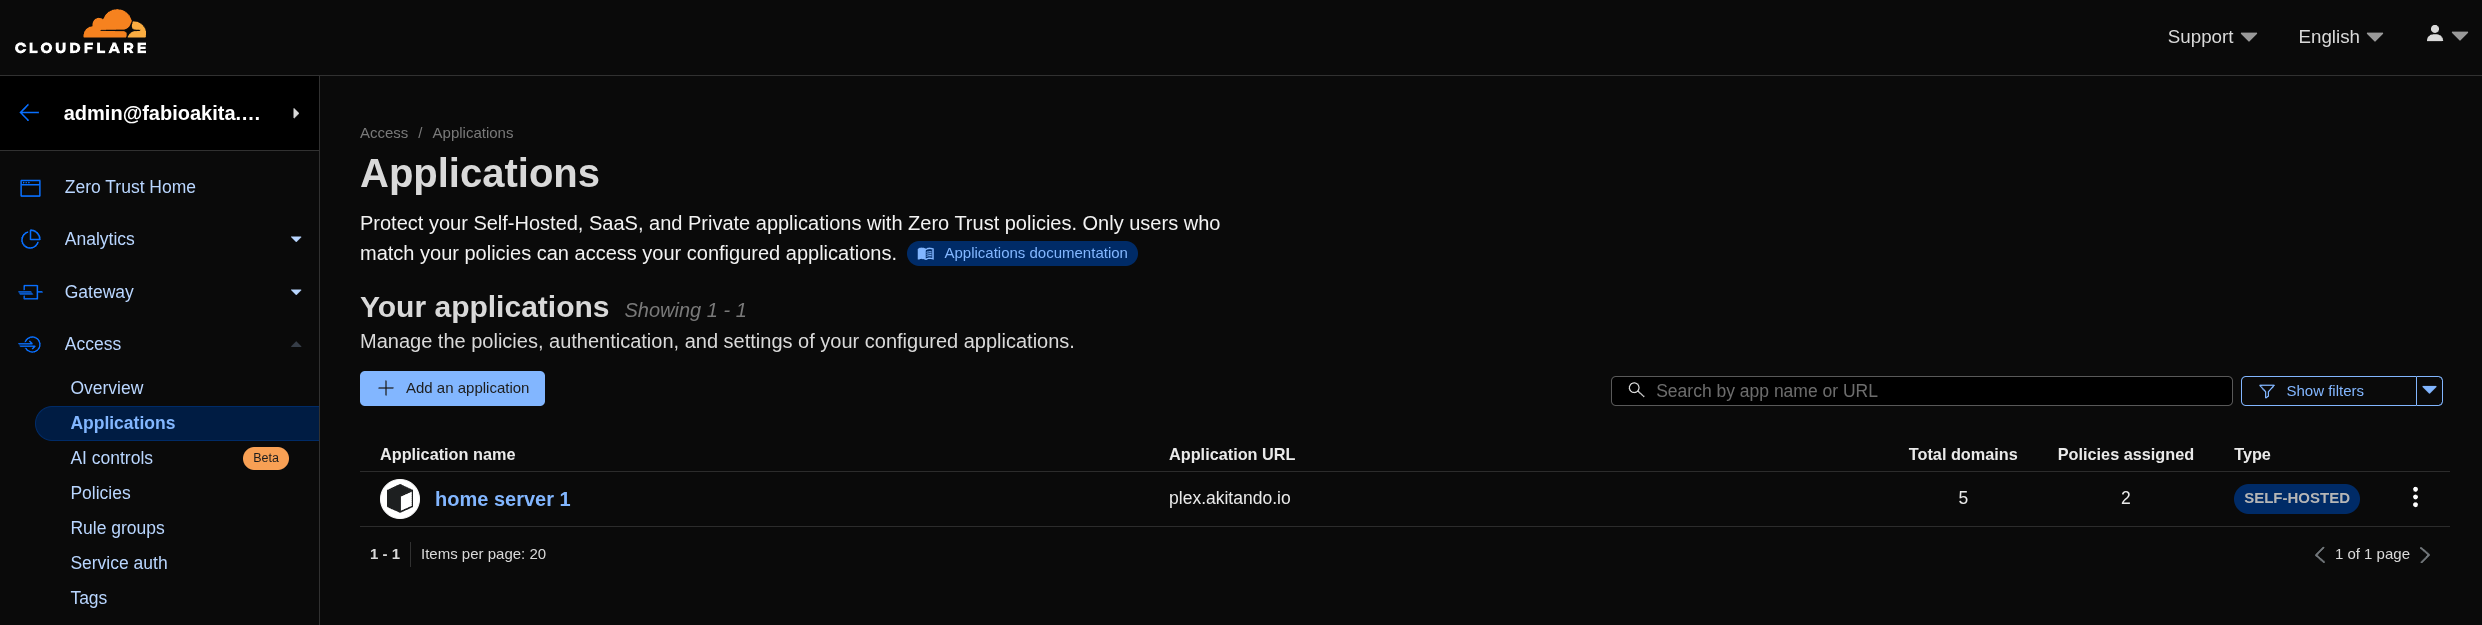
Click “Add an Application” and pick the type as “Self-Hosted”:
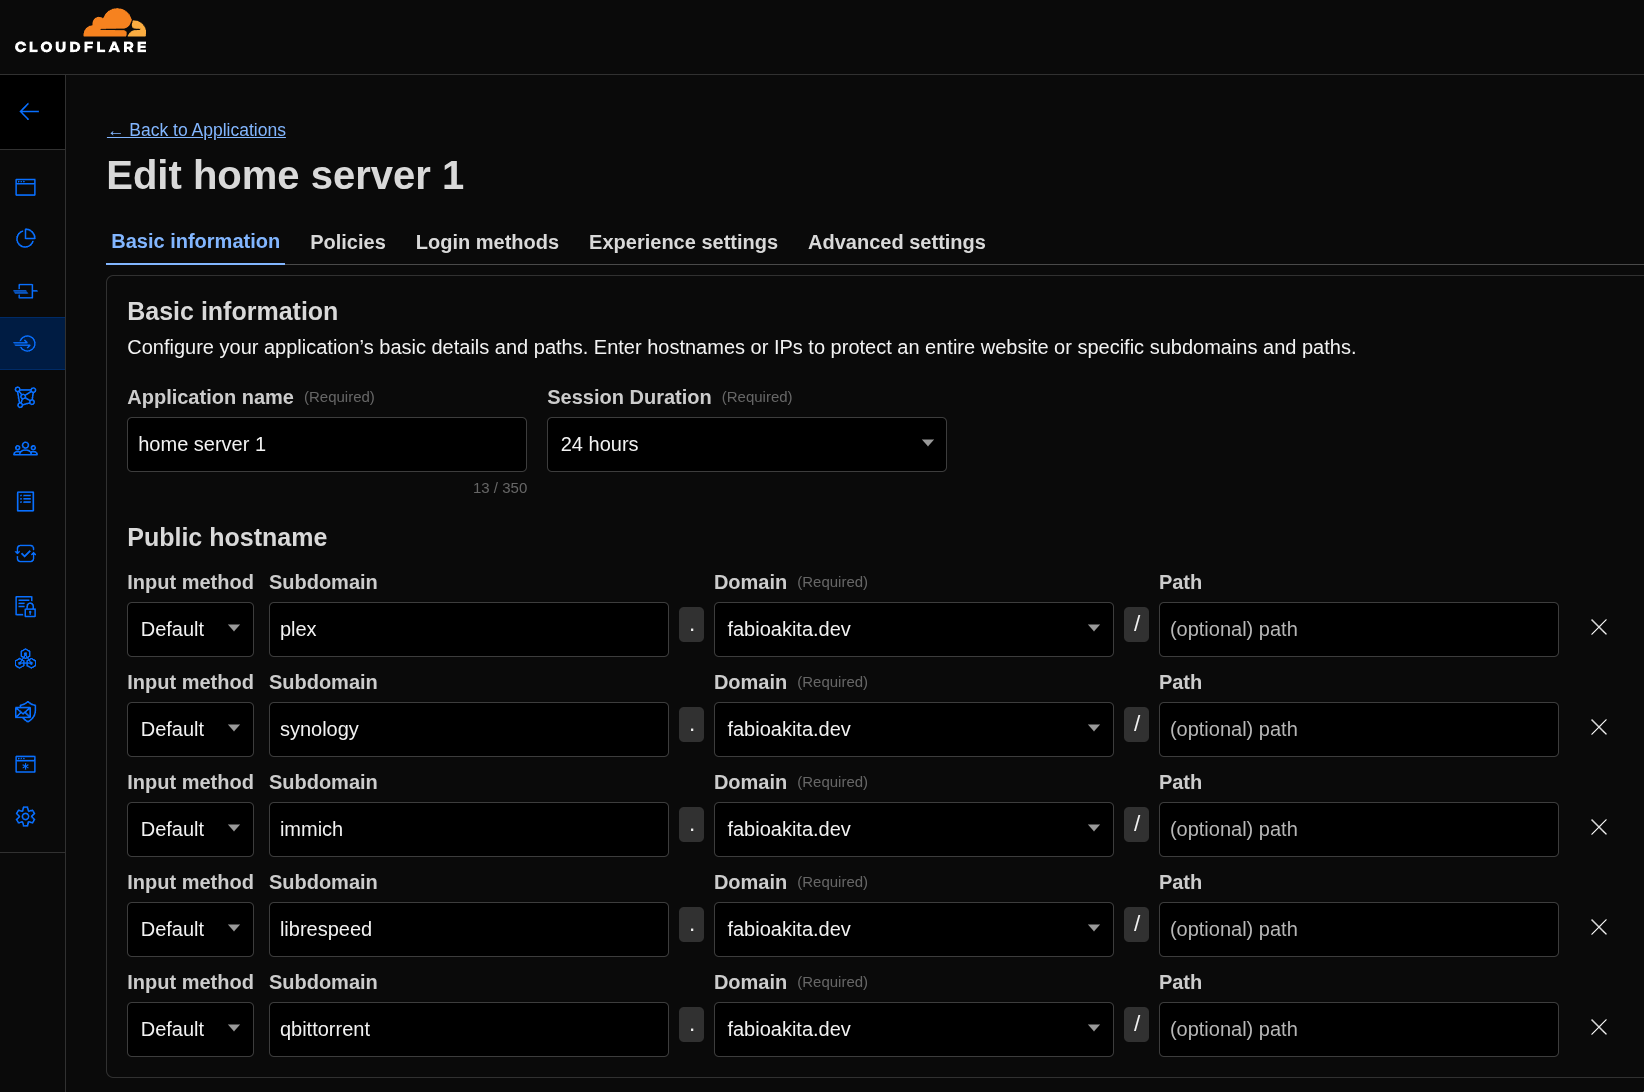
My understanding is that each application supports at most 5 hostnames. I have quite a few more than that, so I’ll have to create more than one application. The configuration in all of them is the same. Under “Basic Information” I just registered the subdomains of each container I want to protect.
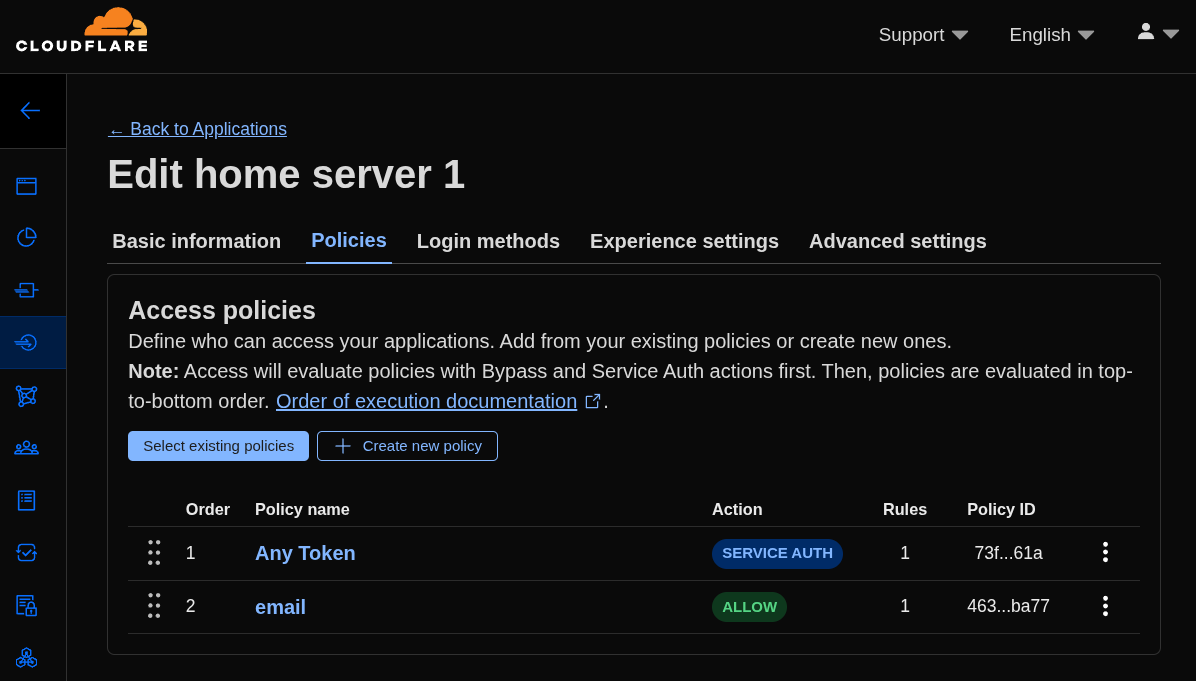
Going to the “Policies” tab, just click “Select existing policies” and add the two policies we just created. That’s it.
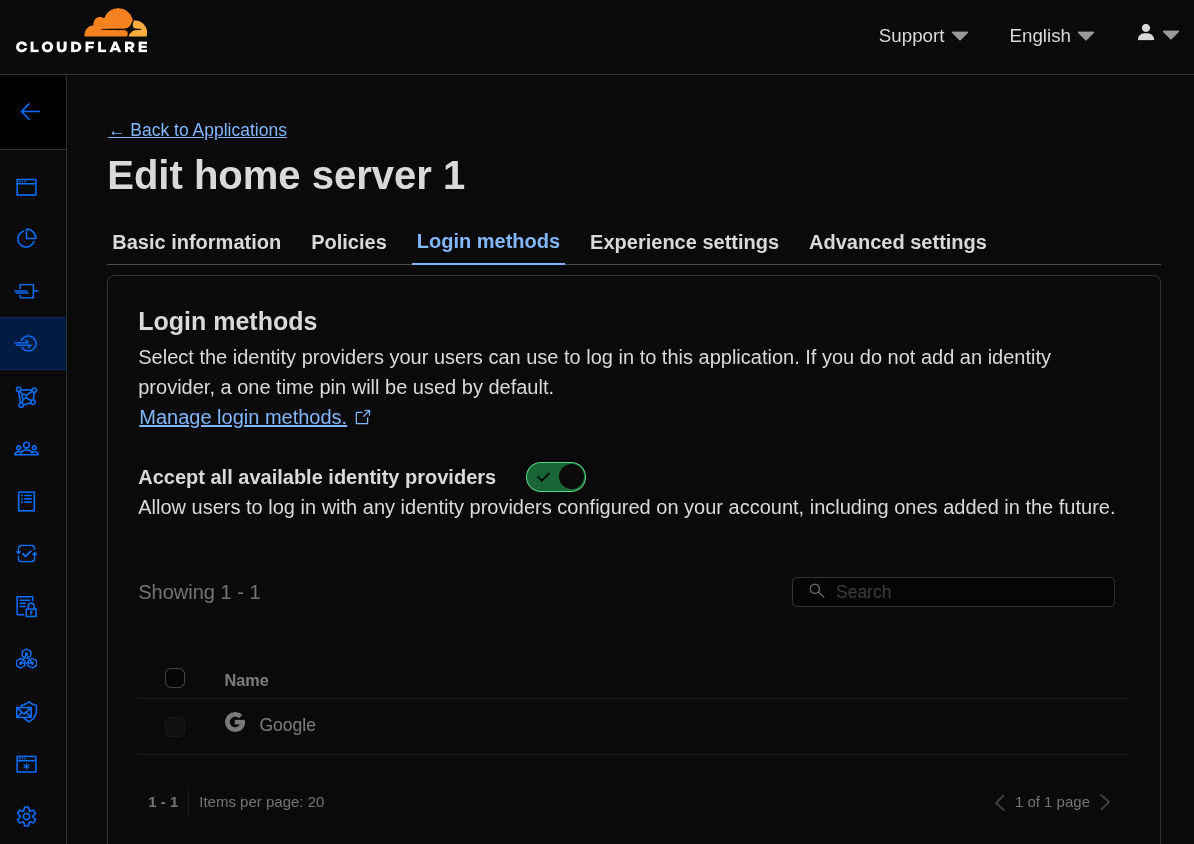
Finally, under “Login methods”, just pick the Google one we configured earlier. And yes, these are the editing screens of an application I had already created. The new application screen has all of this on a single page, but you get the idea.
And as far as I understand, that’s all. Theoretically, everything is already working!
7. Testing the new Login
If nothing went wrong, just hit one of the hostnames we registered in the Zero Trust application, for example https://immich.fabioakita.dev, and we should see this screen first:
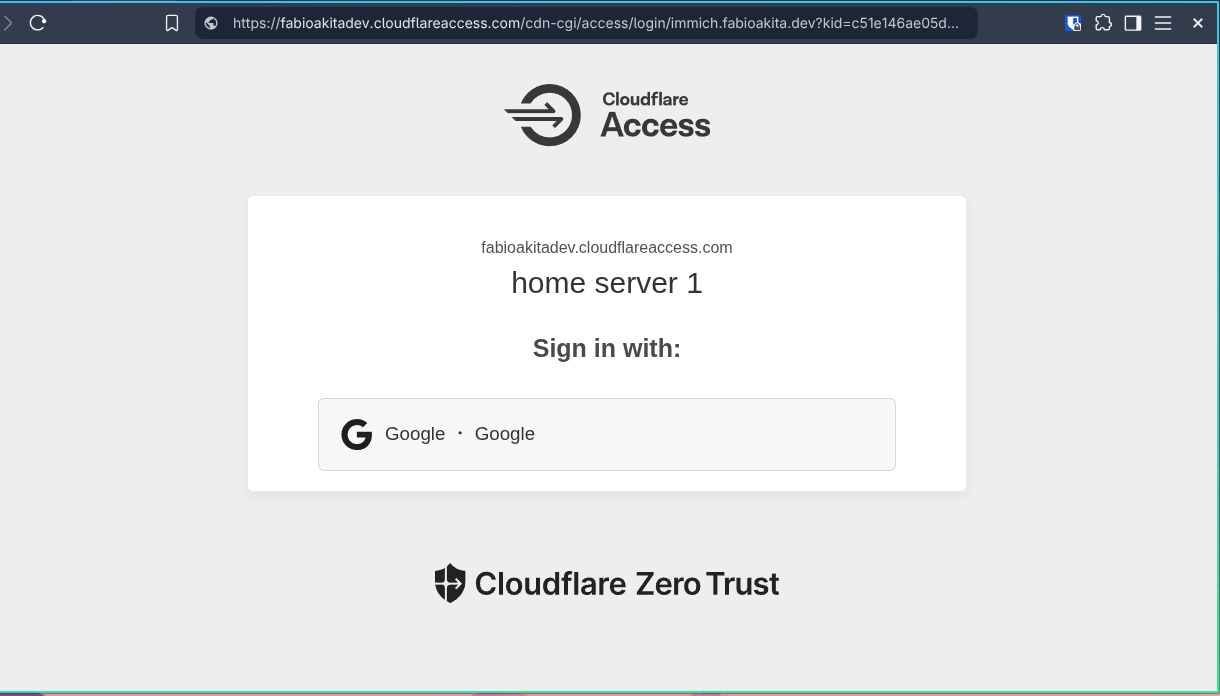
If this shows up, success! Zero Trust blocked access to my application until I logged in to it first.
Later you can customize the text however you want, but since it’s just for me, the “welcome” copy doesn’t matter, because actually, nobody is welcome here, just ME!
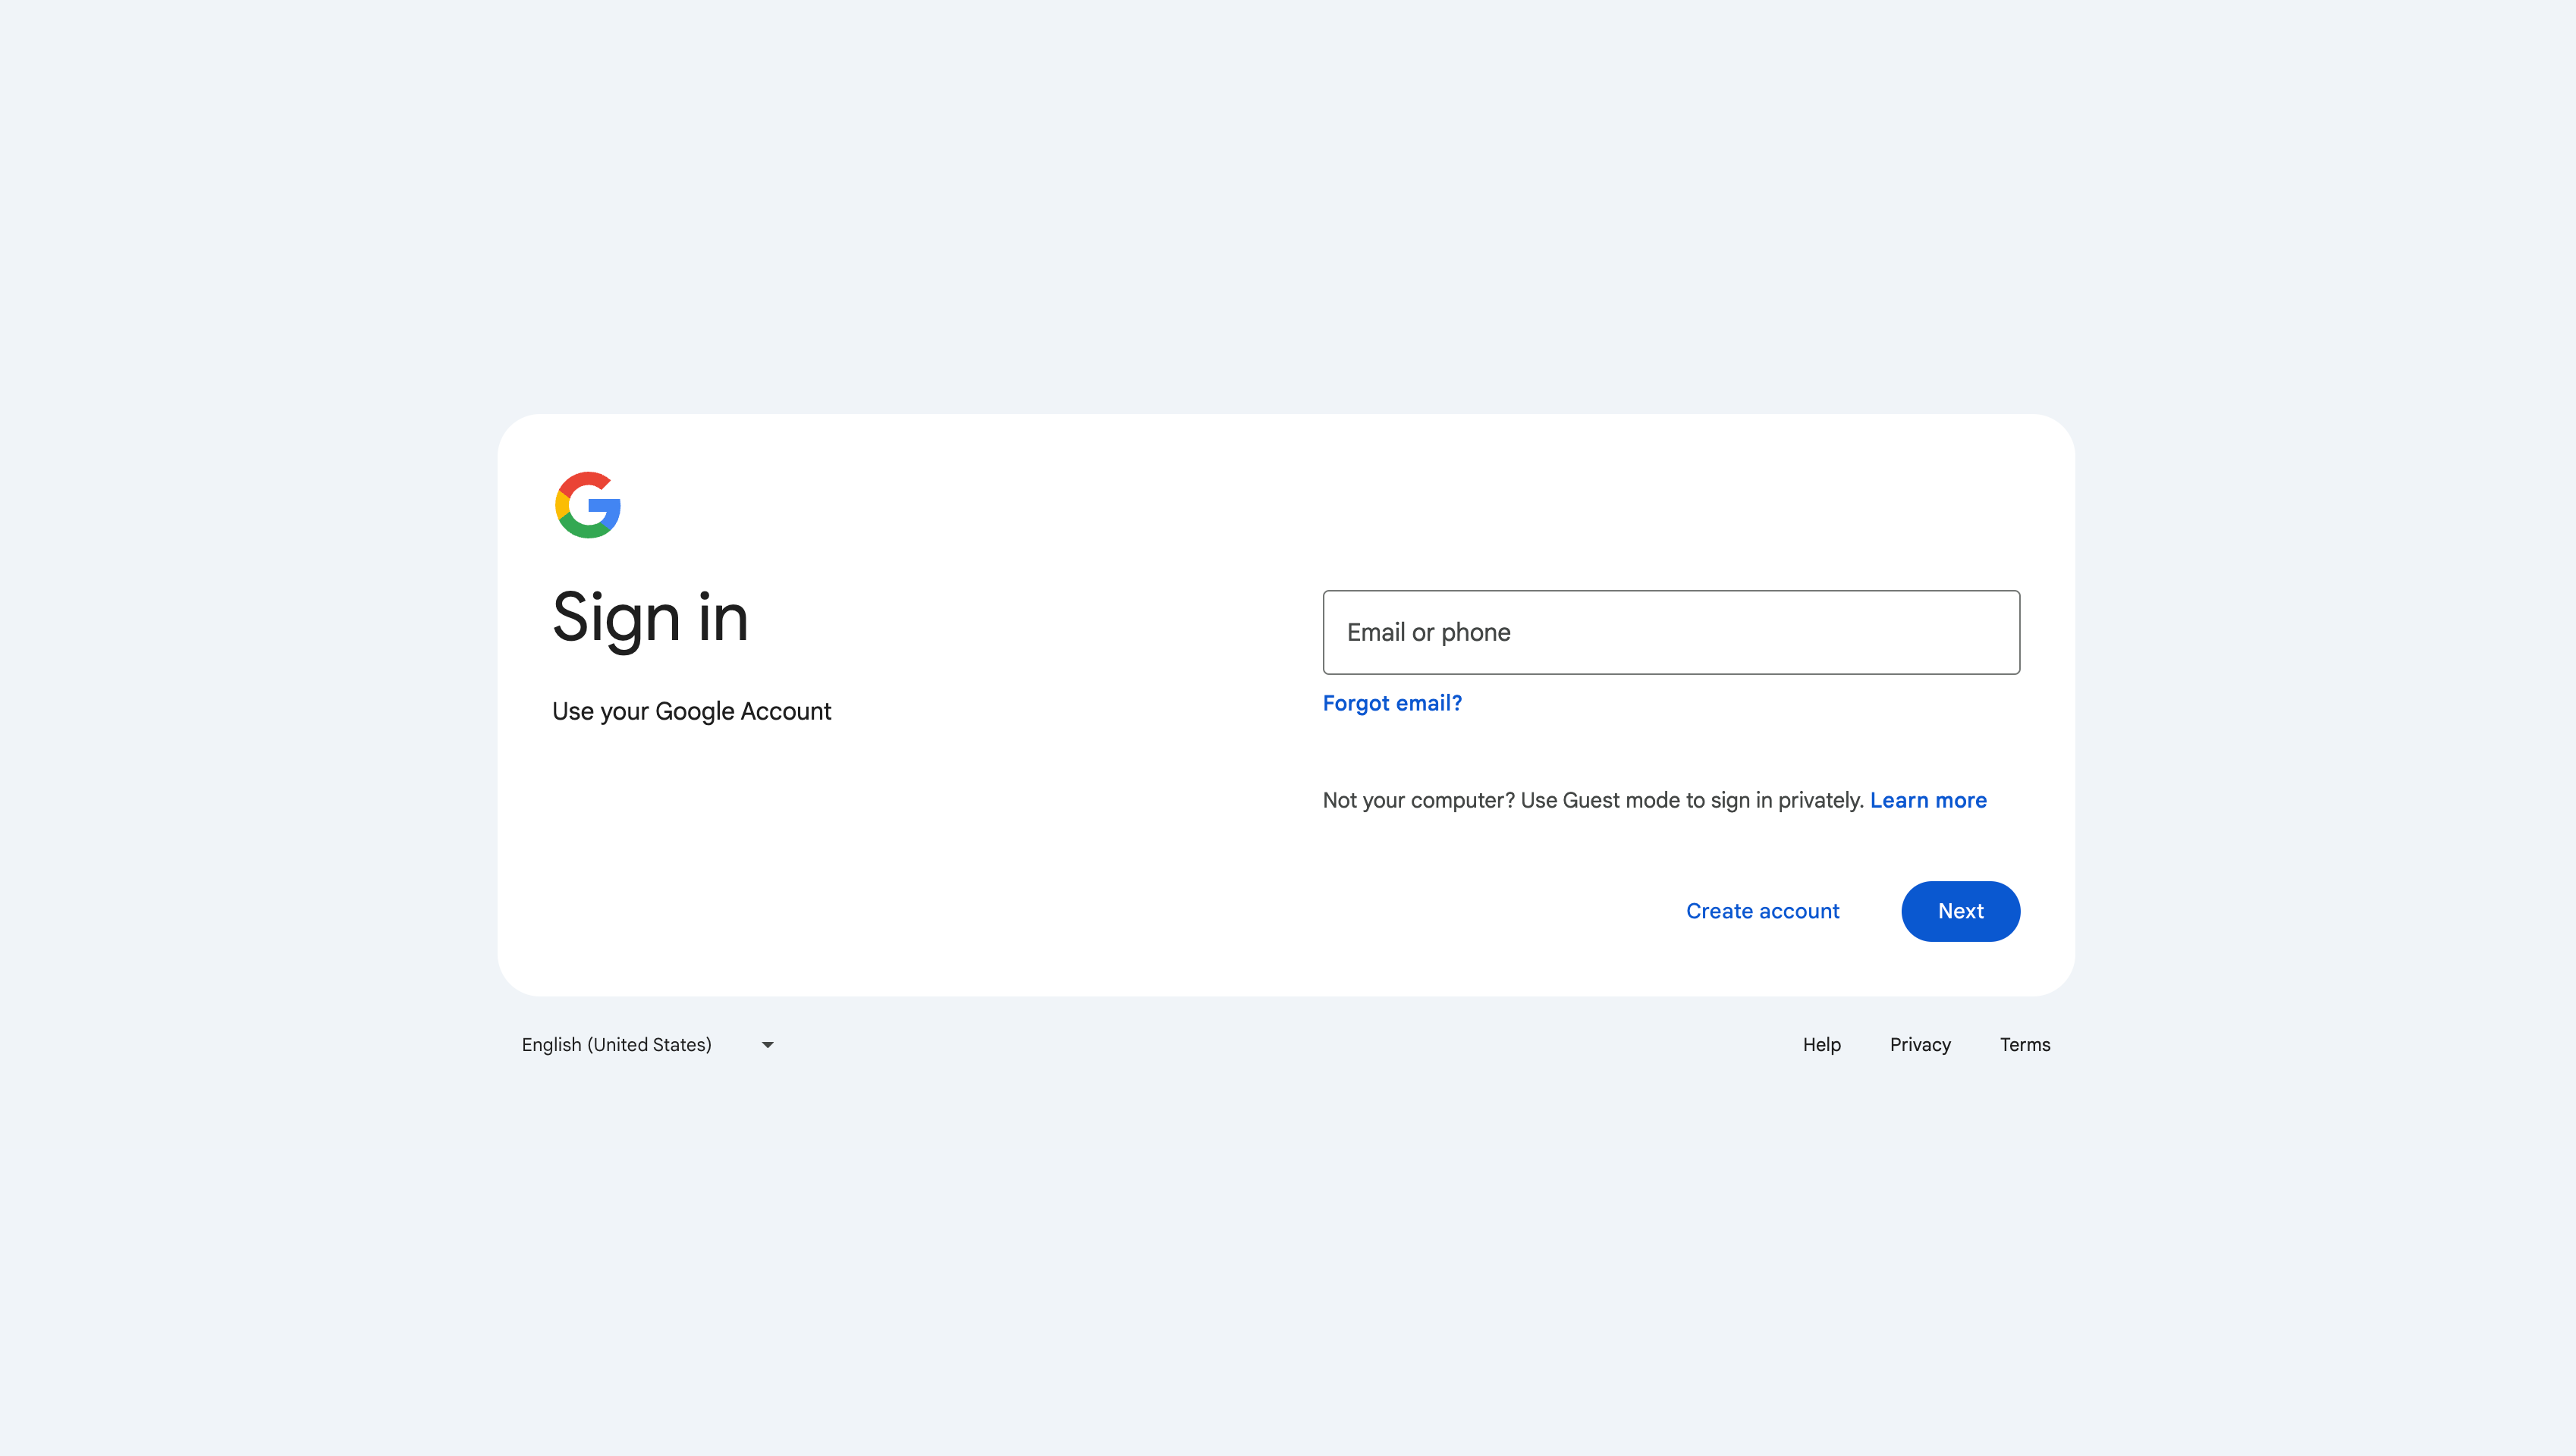
Clicking “Google” opens the familiar Google login pop-up, and only after that do I get to reach my application’s own login underneath. And this applies to every hostname I added to the Zero Trust applications.
Once you log in with Google using the correct user, the session stays valid for 24 hours (which is what we configured in the policies and application). During that window you don’t need to log in again on Zero Trust for any of the other applications on my home server. The session is shared across all applications.
8. Logging out Sessions
Once you’ve done the first login with your user, you can control that session by going to “My team” and “Users”:
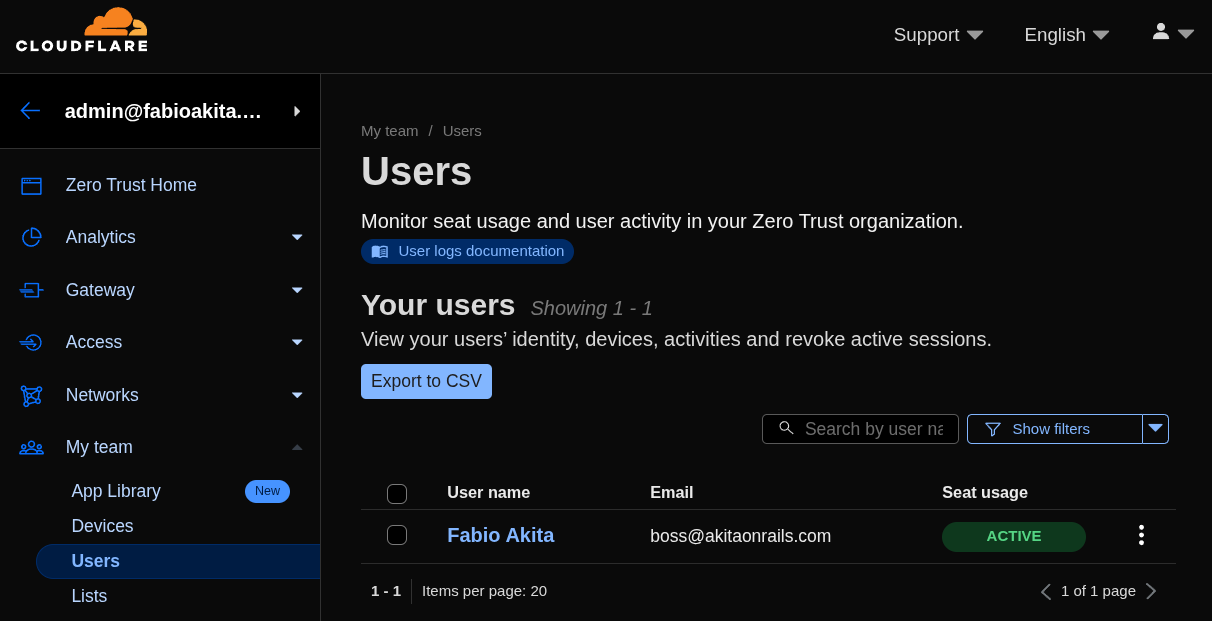
Clicking on the user, you get a bunch of info and options, in particular see “Revoke Sessions”.
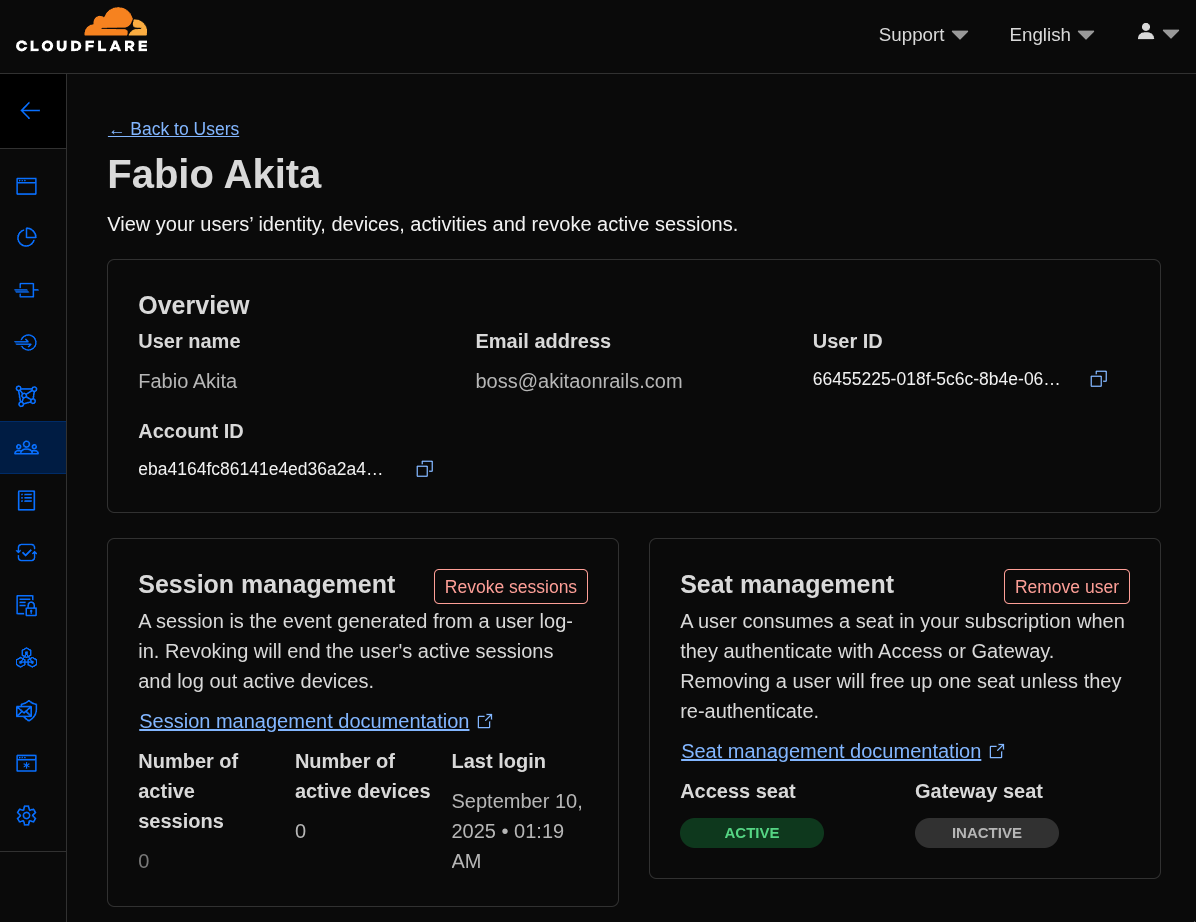
This way we can test the login without waiting 24 hours for the auth token to expire on its own. It’s a way to force logout your users. On the Zero Trust free plan, from what I understand, you can have up to 10 users in your organization.
Conclusion
I had never used Zero Trust before, so I might have made some mistake in the procedure. Read the documentation too. In principle, it seems to be working. I already created more applications and registered the rest of my hostnames.
Just by using CloudflareD for encrypted tunnels, all traffic reaching my home server goes through a series of Cloudflare protections that include: DDoS protection, URL normalization, Origin Rules, IP Address Rules, WAF (Web Application Firewall), Bots Mitigation, Rate Limiting, Cache, Compression and more.
These layers protect against the main well-known attack types, and they’re always adding new rules as each new vulnerability becomes known. Even if you, as a developer, don’t know how to protect against everything in your application, there’s a chance Cloudflare protects you first. That’s why I recommend keeping your domains under Cloudflare’s control.
On top of all of that, we also add Zero Trust, which guarantees that only after a login with my Google account will it start allowing access further down. And at the end of that there’s still one last barrier: the individual login screens of each application running on my home server.
Beyond that, the Cloudflare dashboard has traffic monitoring, analytics and much more. I configured just the basics, but if you want to go deeper, there are plenty of extra policies and rules you can add.
For someone to get through all of this and actually break into my home server and my LAN, they’d have to be really dedicated and really smart - I can’t picture anyone like that wasting so much time just to access a video server 🤣 but they’re welcome to try.