Understanding the Basics of ComfyUI to Generate AI Images
In the previous post I explained my little project to spin up ComfyUI pre-configured and pre-loaded automatically using Docker Compose. Assuming you already have everything up and running, now it’s time to actually understand this beast called ComfyUI a little.
I’m no expert either, but I thought it would be cool to explain a few concepts that many people overlook.
Pre-Trained Models
Every GPT out there, or Stable Diffusion or others, loads a vector database into the GPU’s memory, into VRAM, in order to process. They are HUGE models, called 7B, 70B, 100B, etc. The “B” stands for “Billions of Parameters”. Parameters have no usable definition outside of math, they are simply numbers. Those numbers represent “something” inside millions of dimensions inside that giant file.
In a VERY ROUGH way, I think of them as compression artifacts. You take PETABYTES of books, images, texts, posts, etc, break it all into tokens and find “relationships” between one token and many other tokens, and you keep “positioning” them in space, but not in 3 dimensions, in millions of dimensions. AI models are “Vector Space Models” or VSMs, more or less like the index of an Elasticsearch if you’ve ever played with relevance-based text search, or any “Full Text Search” plugin in Postgres or MS-SQL. They’re all VSMs.
Here’s how I think about it: it’s as if the training process - the SUPER EXPENSIVE part, which takes MONTHS - takes all the information that’s fed in and compiles a new “dictionary” for a new “language”. Now, when you “talk” to a GPT, first it needs to transform your text from your language into this internal “language” of its own, which is what we call an “Embedding”.
Any data can be transformed. Audio can be converted into text and from text into embeddings. Videos can be broken down into series of images with temporal information. Images can be deconstructed into elements like luminance, chrominance, etc. In the end, everything can be deconstructed into data structures, there’s no magic.
Image generation models are trained differently. There are several focuses, focus on facial sharpness, focus on pose accuracy, focus on different styles like cartoon or painting, focus on categories like animals or objects. That’s why there are dozens of models out there and lots of “loras”.
To generate an image from a prompt, first you need to decode your prompt into an embedding, and that’s what things like a TEXT ENCODER in ComfyUI are for.
In the specific case of AI for images, the way I understand it is that they use something called a “DIFFUSION” model both to deconstruct the original image and to reconstruct a new image. It’s not intuitive, but the reconstruction doesn’t start on a blank canvas, the way it would for a human illustrator. It starts with an image filled with random “noise” like this:

The model starts from this noise and through a process called DIFFUSION it begins to redraw the image backwards, until it emerges from the chaos and arrives at an image.
What I “THINK”, what I “GUESS” is happening - without having read any paper, pure laziness - is that we try to influence this initial noise. For example, by extracting features from the image like a depth map, which looks like this:

The original photo looked like this:

Extracting a Depth Map is an ALGORITHM, it’s not “AI”. Any Photoshop or Premiere out there can do this with one hand tied behind its back. But the point is to explain that there’s much more information in an image than what you - untrained as you are - can see is there.
Another well-known type of ALGORITHM is Canny Edge Detection, which produces an edge map, making it easier to know where something starts and ends in the image:

So it goes more or less like this:
- just as a text is “converted” into an Embedding, vectors that capture the “essence” of the meaning of the text, dependent on the VSM of the pre-trained model, an image is “converted” internally into a LATENT, which because it’s an image is a “space” (that’s why people talk about Latent Space). We can’t “visualize” Latents, because it’s an internal representation that depends on the U-NET, the pre-trained model, the neural network that learns to “denoise” the Latent.
- An image U-NET is roughly similar to a text model like GPT or LLaMA, the pre-trained, read-only model that will be used to produce the final result.
- A GPT response is a continuation of the context of the previous conversation. It’s not “answering” you directly, it’s just “continuing” the text of the conversation and, by chance, due to training, the result “looks like” a response. In the case of images, we start with a randomly noisy image and through a process of removing and adding noise, it gradually “rearranges” the Latent into an image we can recognize.
- There is a “Scheduler” that decides how much noise is added or removed at each time step. And there is the concept of a DIFFUSION MODEL, which is more or less the processing “pipeline”.
- We can control the process by adding a text prompt, which is decoded into an “embedding” using a Text Decoder that usually has names like “CLIP” or properly a Transformer (such as LLava). These embeddings go into the U-NET via cross-attention layers, steering the “denoising” toward the meaning of the prompt.
- On top of that we have CONTROLNET, which is a second parallel network that adapts the process to extra conditions. It’s a copy of the U-NET architecture (with frozen weights) that receives extra inputs, like Canny Edges, or Depth Maps, pose skeletons (via OpenPose), etc, and learns small adjustments to INJECT into the main maps of the U-NET.
- During the denoising process, ControlNet activations are merged with those of the U-NET, forcing the process to respect the conditions we passed in.
So the U-NET is the “generator”, the Diffusion Scheduler orchestrates the process, text encoder and controlnet both influence the U-NET, and a VAE is used at the end to convert a latent space into an actual image that we humans can actually see.
VERY, VERY ROUGHLY. That’s more or less how I understand the process. And the way I see it, ComfyUI exposes several of these steps in the form of “PROGRAMMABLE NODES” that we can parameterize and tweak to influence how we want the final image to come out.
Beyond numerical parameters, these Nodes also let us choose which pre-trained model files we want to use for each stage. It’s all binary VSMs, but for different uses, which is why many of them have the same extension as I explained, but they live in different sub-directories. So each Node can find only what matters to it.
Taking my photo as an example, this isn’t exactly it but just to illustrate, it helps me think that those maps I showed influence the “noisy” image in a non-random direction, like this one I grabbed from an intermediate stage of the workflow I’m running:

If you strain your eyes, you can see the influence of the previous images, and the Diffusion model keeps doing the “denoising”, being “interrupted” by the ControlNet. It’s as if you were drawing and had a person next to you who every now and then erases what you did, or draws on top, and you keep adapting. So in the end it becomes a “collaborative” job between the two. If it were only the U-NET, it would generate a brand new image quite different from the original, but the ControlNet is the “client” that keeps nagging in your ear “that’s not how I want it, change it”, until it arrives at an acceptable result.
On top of that, a U-NET isn’t great at generating very high resolution images. The ideal is to generate small images, 512 pixels, 1024 pixels, but nothing bigger. But that would be useless for professional use. That’s what UPSCALE MODELS are for. If you read my article from yesterday about Video2K I explain that I pick a model there that’s good for temporal coherence in video. But there were other models that are better for “STATIC IMAGES”, or photos. And we can use them in ComfyUI.
After the new small image is generated by the U-NET, we can then use it as input to a second “UPSCALE” pass using a model like RealERSGAN, and go from a 1024 pixel image to 2160 pixels, essentially 4K. It’s different from enlarging the image in Photoshop, where everything ends up “soft” and blurred. Since it’s also another AI model, it’s trained to “redraw” at higher resolution. And we can add this to the ComfyUI workflow as well.
More than that, ComfyUI also supports Nodes with models like Tencent’s HunyuanVideo, which I introduced in another article from yesterday, about FramePack. In fact, we can do the same thing FramePack does but from a ComfyUI workflow: generate a video from an image, using the same model. FramePack is infinitely easier to use, but ComfyUI is the Swiss Army knife of AI: it does EVERYTHING, which is also why it’s infinitely more complicated and you need to put in serious effort to learn how to use it.
With what we’ve covered so far, take a look at the workflow I used (it’s zoomed out, you can dynamically zoom in):

You can see these intermediate steps using PREVIEW Nodes, so this is more or less how we can use ComfyUI to do a lot of advanced stuff. As I said, I myself haven’t even started scratching the surface.
Let’s now summarize some of the concepts used in ComfyUI:
1. Checkpoints (Base Models)
What they are:
These are the main Stable Diffusion models (e.g.: SD 1.5, SDXL, Flux). They contain the entire model architecture:
Text Encoder (CLIP)
Diffusion Model (U-Net)
VAE (Image Decoder)
What they’re for:
Generating images from scratch. Each checkpoint has a different “style” (realistic, anime, etc).
Examples:flux.safetensors, realisticVisionV60.safetensors, anythingV5.safetensors
2. VAE (Variational Autoencoders)
What they are:
Component that decodes images from the latent space (the format the model understands) into visible pixels.
What they’re for:
Improving details and colors
Some checkpoints require specific VAEs
Examples:vae-ft-mse-840000.safetensors, animevae.pt
3. Text Encoders
What they are:
Models that convert your text prompt into numerical representations the AI understands.
Common types:
CLIP: Standard for most models
OpenCLIP: Alternative version used in SDXL
T5: Larger models for complex prompts
Examples:clip_vision.safetensors, openclip.safetensors
4. CLIP Vision
What they are:
Models specialized in visual analysis (as opposed to normal CLIP, which is text→image).
What they’re for:
Creating descriptions of existing images
Tools like “Image Prompt” (which use the image as input)
Example:clip_vision_g.safetensors
5. Diffusion Models
What they are:
A specific part of the architecture (U-Net) responsible for the diffusion process (adding/removing “noise”).
What they’re for:
Training LoRAs
Advanced reuse workflows
Example:unet.safetensors
6. LoRAs (Lightweight Adapters)
What they are:
Small files that modify the behavior of the main checkpoint without replacing it.
What they’re for:
Adding specific styles (e.g.: anime)
Creating consistent characters
Adjusting body proportions
Example:epiNoiseOffset.safetensors, add_detail.safetensors
7. ControlNet
What they are:
Models that impose control over the composition of the image (poses, depth, edges).
Common types:
OpenPose (human poses)
Canny (edges)
Depth (depth)
Example:control_v11p_sd15_openpose.safetensors
8. Upscale Models
What they are:
Models for increasing the resolution and detail of generated images.
Types:
ESRGAN: For realistic details
Anime6B: Specialized in anime art
Example:4x_NMKD-Superscale-SP_178000_G.pth
9. Embeddings (Textual Inversions)
What they are:
Small files that add new concepts to the model’s vocabulary.
What they’re for:
Specific artistic styles
Custom objects
Artifact corrections
Example:bad_prompt.pt, easynegative.safetensors
10. Style Models
What they are:
Models specialized in applying visual styles or art “filters” on top of the generated image, without actually altering the basic structure of the content.
What they’re for:
Thematic colorization (e.g.: watercolor palette, sepia, chroma-key)
Simulating artistic techniques (oil, gouache, manga linework)
Unifying aesthetics across series of images (same color and light “mood”)
Example files:
flux1-redux-dev.safetensors(“Flux Redux” style)watercolor_v2.safetensors(watercolor brushwork)film_grain_vintage.safetensors
11. SAMs (Segment Anything Models)
What they are:
General segmentation networks capable of isolating objects or regions of interest in an image, producing binary or weighted masks.
What they’re for:
Creating masks of objects/people for selective application of filters or compositions
Guiding ControlNets (e.g.: applying diffusion only inside or outside a region)
Pre-processing references (cropping background, separating layers)
Example file:
sam_vit_b_01ec64.pth(SAM ViT-B, base segmentation model)
Visual Summary
models/
├── checkpoints/        ➔ Main models (Stable Diffusion)
│     └── *.safetensors, *.ckpt
├── diffusion_models/   ➔ Alternative diffusion models
│     └── *.safetensors, *.gguf
├── loras/              ➔ Style adapters (LoRAs)
│     └── *.safetensors
├── controlnet/         ➔ Composition controls (ControlNets)
│     └── *.pth, *.safetensors
├── vae/                ➔ VAE decoders / encoders
│     └── *.pt, *.safetensors
├── clip/               ➔ CLIP text encoders
│     └── *.safetensors, *.pt
├── clip_vision/        ➔ CLIP vision encoders
│     └── *.safetensors
├── text_encoders/      ➔ Advanced text encoders
│     └── *.safetensors, *.bin
├── upscale_models/     ➔ Super-resolution models
│     └── *.pth
├── sams/               ➔ Segment Anything (SAM) models
│     └── *.pth, *.onnx
├── style_models/       ➔ Visual style models
│     └── *.safetensors
└── embeddings/         ➔ Embeddings / custom concepts
      └── *.pt, *.safetensors
You have to download the right things into the right places. And to make matters worse, as I already said, the files usually have the same extension. So it’s very easy to get confused and drop a text encoder into the clip directory or vice versa. Once again, that’s why I encourage you to update the “models.conf” file and put the right URLs into the right lists, that way it stays much more organized and my Docker setup will pull things into the right places at startup.
Even so, you may still have a few other doubts that I had at the beginning too. For example “Why is the U-NET called a Checkpoint?”
Checkpoints ≈ A Complete Operating System
Similarity: Just as a commit in Git captures a specific state of the code, a checkpoint is a complete “snapshot” of a model trained at a specific stage.
Difference: Checkpoints are self-contained (they aren’t “diffs” like commits), each one is a complete model that can work independently.
Better Metaphor: Think of checkpoints as different versions of Windows (XP, 7, 10) - each one is a complete operating system, not incremental.
So checkpoints kind of resemble, conceptually, a “git commit” - if you’re a developer. Or BTRFS or ZFS snapshots - if you’re an infra/devops person.
LoRAs ≈ Plugins/Extensions
Similarity: Just as a PR adds functionality to a base codebase, a LoRA modifies the behavior of the base model.
Difference: LoRAs aren’t “merged” into the original checkpoint, they are applied dynamically during inference.
Better Metaphor: They’re like Chrome extensions (e.g.: AdBlock) - they add specific behaviors without modifying the browser itself.
Think of it this way: a model has Checkpoints, like commits, so you can “continue” training on top if you need to. At the same time, we don’t have to mess with the main model, we can create separate layers, the so-called LoRas. For example, let’s say a model is having trouble generating your face, no matter what prompt you use or what Nodes you configure.
Instead of that we can use the “dictionary” of the pre-trained model, like Flux or SDXL, and do training with our personal photos and produce a LoRa specific to me. Then we can add a LoRa Node into the workflow and that will result in much better images with your particular face.
There are entire online communities dedicated to this. One example. On the Civit AI site we’ll find lots of models based on existing models, like this Mistoon which is based on SDXL.

It’s a checkpoint. We can sign up on the site and download the file mistoonAnime_v10Noobai.safetensor and put it in the models/checkpoints directory.

Now, in any workflow that has the “Load Checkpoint” Node we have the option to choose this model. But let’s say this model isn’t able to generate a character with a school uniform like in many anime. Browsing the site, we find this LoRa:

Mistoon_Anime\ school\ uniform.safetensor which we should move to models/loras - is less than 290 MB, much smaller because it’s a specific training only on images of school uniforms.
Now we can wire the “Load Checkpoint” Node to this other “Load LoRa” Node and choose this LoRa that we know is compatible:

LoRas have to be picked to be used with the models they were based on. As I said before, think of the model as a “language”, if we make a LoRa in German, there’s no point mixing it with a Chinese model, roughly speaking. But this is one way to do fine-tuning so the model you like delivers results no other one can.
One problem I have with the Civit AI site is that you can only download things while logged in. That’s why I didn’t include any of their models or loras in my automatic install script. Unfortunately, in their case you have to manually download the files and move them to the right directories, write it down somewhere, so on another machine you can download and move everything all over again. It’s a pain that I haven’t sat down to fix yet. If anyone wants to contribute a solution for this (without exposing anyone’s login cookies, send a Pull Request).
A Real Example
Your day-to-day with Comfy, being a newbie like me, will go more or less like this: you start by going to Google and searching for “best workflow image to anime ComfyUI”. The first links are usually some Reddit thread:

Sub-Reddits like r/comfyui or r/StableDiffusion usually have news and workflows like this one. Then we go straight to the first comments:

Either that, or we open the workflow directly in ComfyUI and inspect the Nodes, one by one:

We may already have a problem: the Node came pre-configured to load a LoRa called “SDXL_aidma-niji_jini.safetensors” but the link in the Reddit comment downloads an “SDXL_Niji_V6_DLC_LoRa_V4.safetensors”. Searching specifically for the previous one on Google, I can’t find it. But it seems “safe” to use this other one, at least the names are very similar, both are derived from SDXL so theoretically they’re at least compatible. This is the page of that model on Civit AI, so you have to download manually and send it to the models/loras directory, same thing for the AniToon Checkpoint in the Node above. Download manually and move it to models/checkpoints.

Note that on this page it explains that this LoRa was made to work with the SDXL_Niji_V6 model and not with AniToon, which is what the Workflow I downloaded suggests in its Load Checkpoint Node. It’s worth testing with both. Either way, since we’re already on the site, let’s also download the suggested model:
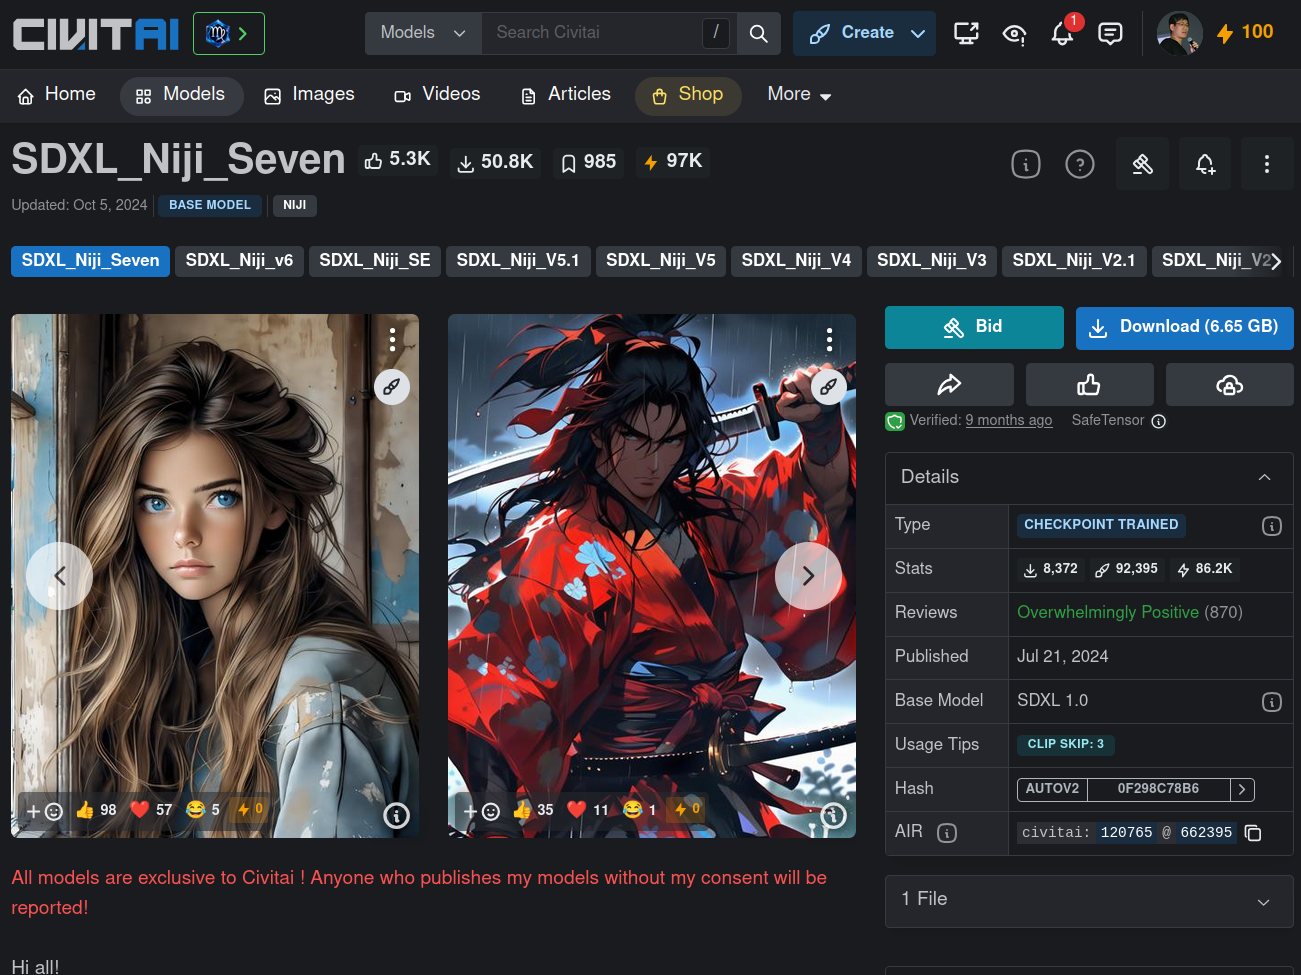
File sdxlNijiSeven_sdxlNijiSeven.safetensors, 6.5GB, move it to models/checkpoints, are you all getting the process? Download, move it to the right place, reload the workflow in the browser and now it shows up, we select it:
By the way, I think it’s intuitive but for those who haven’t figured it out after opening the ComfyUI interface:
- left mouse button selects Nodes
- middle mouse button drags the canvas
- scroll wheel zooms the interface
Now then, let’s pick these two to test:

Taking advantage of this same image, notice in the left corner a Florence2 Node, which is a Microsoft LLM (and my Docker script already installs it for you). I can’t show all the related Nodes but these are the main ones explaining what it’s for:

The ideal in image generation is to write the longest and most detailed prompt about the original image that you can, but most people just write some garbage like “person smiling standing up” and think that’s enough. The Florence2 model is built to read an image and describe it in text.
Now there’s another detail: many checkpoints or Loras are trained with some activation keyword. So they only kick in if you type those words into your prompt. So this workflow doesn’t need you to type a prompt manually, Florence2 will do that, and every time its text starts with “The image … bla bla bla”, so we have a “Text Find and Replace” Node that swaps that “The Image” for the keywords of Anitoon or Niji: “aidma-niji, niji”.
Are these the right words? I HAVE NO IDEA lol
The workflow already brought these words, but on the Civit AI pages - where it should be documented, it’s not!! So we’re really GUESSING that it should be “niji” since that’s the name of the model and the lora. Pay attention to the keyword, it’s important, otherwise you add the lora and nothing changes and that’s because you forgot it in the prompt!!

There’s more, you have to check that the Nodes for things like VAE, ControlNet, Canny and everything else are populated with files that we have. Usually you use the same half-dozen and I’ve already pre-installed the main ones in Docker. In the image, see that the ControlNet is contronet-union-sdxl-1.0-promax.safetensors, compatible with SDXL, and we’re using Niji which is built on top of SDXL. We just keep guessing like that.
Also notice that it uses Zoe Depth Map to extract the Depth Map and Canny to extract the Edge Map as in the other workflow. You can configure it, in this workflow notice that the Edge Map picked up some weird artifacts in the background, you can adjust it to remove that. That’s why in the previous example the final image also had a window appearing, the model thought it was a window! But for now let’s leave it as is.
Now we can run it:

There’s a huge “RUN” button in blue down at the bottom. If everything is configured correctly, you’ll see that a job has been added to the queue. The interface is smart enough to let you work on other workflows and just keep queueing jobs while the GPU is processing. You don’t have to sit waiting, just leave several queued up and go to sleep.
When it runs, in the interface the Nodes that are processing at any given moment will get a green border, which is good so you know what stage of the process it’s in. And if any Node has an error - because a file is missing, for example - it’ll get a red border, so you have to fix it and run again.
And in the end, here’s one of the results:

Notice how the controlnet maps guaranteed the correct pose. The model interpreted those background artifacts from the edge map as lighting from some window, but in the original photo we can see it’s like the concrete brick of the wall lol but that’s how it is, without knowing, it guesses. And if you run it several times, it’ll always give you a quite different result. Look at another one:

Way off lol But we can swap the SDXL-Niji model for Anitoon. Let’s see one of the results:

Switching to the waiNSFIllustrious model:

This one came out even more off. Something in the maps is making the model assume that I have curly hair, no idea why. But that’s it: you have to tweak the parameters. The result of the workflow I showed at the beginning of the article gave a better result, using the same models.
Of all the Nodes, one of the most important is the “engine” of the process, the KSampler:

This is the guy who runs the show. We give it the model, the prompt, control-net outputs, and it’s the one that iteratively (steps) does the “denoise” of the Latent. Notice that there’s always a random factor (“seed”), a number of steps (25 to 50 is the average), “cfg” (classifier-free guidance) or “guidance_scale”, where higher values pull the image more toward your positive prompt. Denoise is how much noise the scheduler applies (1.0 is full noise, below 1.0 may produce more “artistic” results, you have to test).
Sampler Name is annoying because you’d need to understand the math behind it, but they are the step algorithms, for example euler, ddim, plms and each one has a trade-off between speed and fidelity. In practice: test them one by one and see the results. Scheduler has normal, klms, dpmsolver. Same thing: test them one by one.
As you can see, there are PLENTY of parameters you can play with. But the main flow is more or less this. From there you have to keep learning Node by Node what each one can do and download lots of pre-made workflows to see how people have been solving various problems, which models and loras are the most popular for each kind of application. Anyway, Reddit is your friend. I hope this gave you some sense of direction, I’m also still learning.