[Off-Topic] Bought My First Mac — Now What?
Update 04/20/2012: This is one of the most-read articles on my blog, first published in 09/2009. Most of the article still holds up well today, so I decided to adjust a few things and add more current information. If you’ve already read this article and want to see only what I added, check this post.
You’re a “switcher”: you’ve decided to take the big leap, step away from the Windows world a bit, and buy your first Mac. The timing is good and prices are accessible, especially if you can buy from someone abroad. Keep one thing in mind from the start: this is a paradigm shift.
The first week or two are the worst. You’ll always have that nagging thought, “On Windows I did this more easily…” or “On my Linux I did this more easily…”. The temptation to go back is strong the first time you leave your comfort zone, same as with any change. Push yourself to learn the new tricks instead of falling back on the old ones.
As soon as you log in to the Mac for the first time, it arrives in a state where you need to configure very little. A few important things to get you started:
- The first difference is that application menus are all centralized. The bar at the top is the only menu, and it changes according to the application that currently has focus. The first option is the icon, which gives access to global system options like “About,” where you can view details of your hardware; “Software Update,” the equivalent of Windows Update; and options like Shutdown. By the way, the very first thing to do when starting your Mac is to run Software Update and install the latest updates. Unlike Windows, you tend to get large packages rather than dozens of small updates.

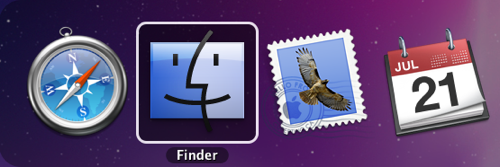
The second option is always the name of the focused application. Initially it will always be “Finder,” the equivalent of Windows Explorer. This menu always gives access to things like “Preferences,” which on Windows usually lives under the “Edit” or “Tools” menus.
Some shortcuts are global and constant. To start, understand that there is the Ctrl (control, as on a PC) key and a special one called Command ⌘. They are different, and although it isn’t a strict rule, things done on a PC with Ctrl are done on a Mac with ⌘. For example, copying text to the clipboard is ⌘+C, not Ctrl+C. Pasting is ⌘+V. Every application closes with ⌘+Q. The “Preferences” option is always ⌘+, (comma). The “Help” menu is always ⌘+Shift+?. A tip on that last Help option: use it to discover menu items whose shortcut you don’t remember or whose submenu you can’t find. Just type a few letters and Mac OS will open the menu and highlight the right item for you.
Unlike Windows, the Mac paradigm is based on one window per document rather than a single application window with embedded document windows. ⌘+W closes the application’s current window. ⌘+N or ⌘+Shift+N usually opens a new window. We don’t normally close applications very often; they tend to stay open. That’s indicated in the Dock, at the bottom of the screen, by a glowing circle below the icon of an open application.
Also unlike Windows windows, the red circle at the top of each window closes only that window, not the entire application. It’s the equivalent of ⌘+W. Another thing: you can move a window from the title bar or the footer bar, when there is one. So even if a window is partly off the physical desktop, you can still move it. On the other hand, the only way to resize a window is from the lower-right corner, not from any edge.

In the title bar of applications that manipulate files, like Finder, Pages, and most apps that show the filename with an icon next to it, the icon is “normally” draggable. You can drag it to a folder and the file being edited moves there. You can also click while holding ⌘ (Command) and it will show the parent folders, letting you navigate them.
Another thing that doesn’t exist on Windows: “Hide Windows.” Get used to ⌘-H to hide all windows of an application. It isn’t the same as minimizing, since hidden windows don’t appear in the Dock. A hidden application keeps a transparent icon in the Dock. Even better: if you have dozens of applications open in a mess of windows behind windows, use ⌘-⌥-H (Command-Option-H) to hide every window except the one currently in focus. It’s a very satisfying way to clean up your workspace and focus on what you’re doing.
To switch between applications, on Windows we’re used to Alt-Tab. On the Mac the near equivalent is ⌘-Tab. But it switches between Applications, not between Windows like on Windows. It’s a subtle difference. If you have Photoshop with 4 windows and Word with 3 windows open, ⌘-Tab shows only 2 icons, one per application. To switch between windows of the same application, use ⌘-` (Command-Backtick). Or, more commonly, use Exposé to pick between windows.
Note the icons on the F1 through F12 keys; they clearly show the functions you get when you press them. F1 and F2 are screen brightness. F3 is Exposé. F4 is the Dashboard, where you install Widgets. F11 and F12 are volume. Those are the main ones. Don’t forget that on newer MacBooks with a Multitouch Trackpad you have options like swiping 4 fingers down to activate Exposé or up to show the Desktop.
Spotlight is very useful. ⌘+Space activates the search field. If you use external hard drives or USB drives and don’t want to waste time indexing their files, open “System Preferences,” option “Spotlight,” and drag the volumes that should be excluded.
If you’re used to Explorer, you’ll miss a lot of things in Finder. You can copy and paste folders and files, but there’s no cut. You move items to different volumes by dragging and dropping while holding ⌘. To force a copy, use the Option/Alt (⌥) key. You’ll end up using drag-and-drop far more than on Windows. You also get different ways to organize your files, especially since ⌘+I opens the Info window, where you can add metadata like keywords for searching and colors (yes, you can even search for files and folders by color in Spotlight).
Another difference between Finder and Explorer is how you rename files and run programs. In Explorer you press “Enter” to run a file and a single mouse click to rename. On the Mac you press “Enter” to edit the name of a file or folder and ⌘+O to run a program. That avoids the situation where you select dozens of files, accidentally hit Enter, and set off a cascade of programs opening. On the Mac that accident basically never happens.
The Dock gives you quick access to your favorite applications. You can drag an icon out to remove it, or drag anything onto it to add it. If you open an application that wasn’t there, its icon appears anyway, because the Dock also shows every running application, with a glowing indicator below it. To keep an application in the Dock, drag it there or, while it’s open, use the context menu (right-click) on its icon and choose “Keep in Dock.” If you want that application to launch every time you log in, use “Open at Login.”
Mac OS Leopard (10.5) doesn’t ship with the US International keyboard layout that’s common on Windows for non-ABNT-2 keyboards (which lack the cedilla). The Mac default is to use shortcuts like ⌥+c for cedilla, ⌥+e for acute accent, ⌥+` for grave accent, ⌥+n for tilde. But if you want the traditional way, download the US International layout for Mac from Brazilian developer Rainer Brokerhoff’s site and follow his instructions. From Snow Leopard (10.6) onward, this is no longer necessary.
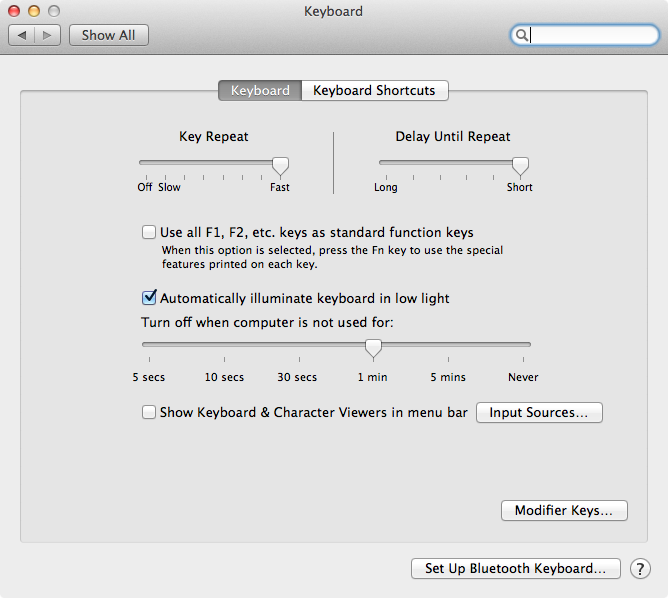
As on Windows and other systems, the Mac’s default key repeat rate is somewhat slow. Open any text editor and use the arrow keys to move the cursor and you’ll notice the lag. I prefer maximum speed. Go to “System Preferences, Keyboard” and set “Key Repeat” to “Fast” and “Delay Until Repeat” to “Short.” You’ll thank me:
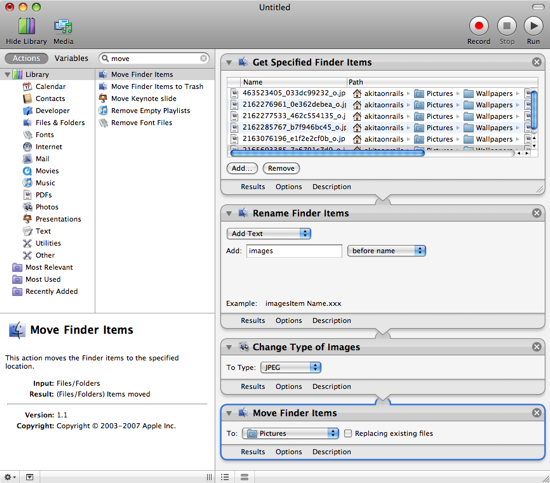
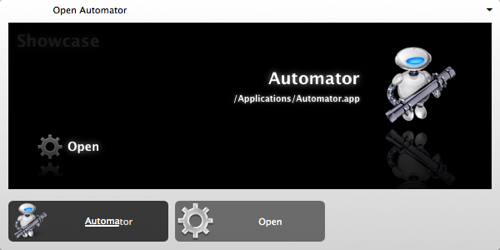
- Say you have hundreds of files, like photos from your digital camera, sitting in JPG, and you want to rename them all to another convention and convert them from JPG to PNG. You can do this and much more with a feature called “Automator.” In Finder, select the files, right-click (on the Trackpad, place two fingers in the middle and use your thumb to click once at the bottom), then choose “More,” “Automator,” “Create Workflow.” That opens the selected items in Automator, a linear flow of “filters” where you chain the output of one filter as input to the next, like “Change Type of Images,” then “Rename Finder Items,” and even “Add attachments to Front Messages,” and so on. It’s an extremely powerful way to chain actions, a lot like Unix/Linux command-line pipes, but far more intuitive.
Few people figure out how to take screenshots at first, since there’s no “Print Screen” key on a Mac. But there’s something far better: ⌘+Shift+3 takes a full-screen shot and saves it as a PNG on your Desktop. If you don’t want the file, ⌘+Ctrl+Shift+3 sends the shot to the clipboard so you can paste it into another application. Even more useful, ⌘+Shift+4 turns your cursor into a crosshair for capturing just the small area you select. Position the crosshair over any window and press “Space” and it captures that whole window. For clipboard-only, use ⌘+Ctrl+Shift+4.
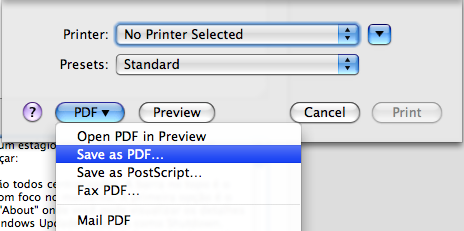
Another important thing: every print dialog opens with ⌘+P, and it always has the option to generate a PDF instead of sending to a printer. That’s extremely useful if you don’t have a printer or want to save a receipt from the web or something like that. Beyond that, the “Preview” application that opens images and PDFs can also do simple editing: resizing images, cropping, copying pages between PDF files, reordering pages, deleting pages. In other words, PDFs are quite editable on a Mac without a commercial Adobe product.
Speaking of “Preview,” learn to use “Quick Look.” To view images, videos, audio, PDFs, Office files, iWork files, and so on, just select the file (or a set of files) and press “Space.” A floating window opens where you can quickly view the file. “Space” again closes it. You can preview most major file formats without opening their respective programs.
On PCs we tend to create custom folders for videos, photos, and the like. On the Mac, try to use the default folders it already gives you. More than that, get in the habit of using iTunes to organize your music and videos, iPhoto for your photos, and iMovie to edit your videos. That keeps your Mac tidy, makes backups easier, simplifies searches, and keeps everything more accessible. Many Apple applications integrate with the iLife suite (iTunes, iPhoto, GarageBand, iMovie, iWeb), so it’s simpler to let these apps manage your files. Watch the screencasts on Apple’s website if you don’t know how they work yet; they’re simple, intuitive, and powerful.
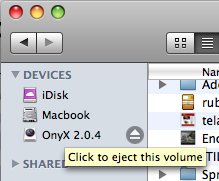
- Installing applications on a Mac usually trips people up at first. You normally download one of two formats: DMG or MPKG. The first stands for (D)isk i(M)a(G)e and is similar to an ISO. When you double-click it, the DMG “mounts” inside /Volumes. The application is usually already there, and you just drag it to the “Applications” folder on your Mac. Then you “eject” the DMG with the ⏏ icon or with ⌘+E. The second format, (M)ac (P)ac(K)a(G)e, is the equivalent of Windows’ MSI: you double-click it and it runs like a standard installer. Usually only programs that need to install a lot of system components use MPKG, like Microsoft Office and Adobe CS4. Sometimes you download a ZIP that contains a DMG or an MPKG. The important part: if it’s a DMG with no MPKG inside, always drag the application to Applications before running it. Safari does an extra step: it downloads the DMG, mounts it, extracts the application, and deletes the DMG, so you drag it from the Downloads folder. A technical detail: MPKGs come with a BOM (Bill of Materials) that works as a recipe of the original system file permissions for scripts that adjust permissions. The same BOM helps uninstall, since it records everything that was installed.

All application preferences are stored in your directory (/Users/your_login), then Library/Preferences. They’re files in plist format, which is XML stored in binary. Regardless of where the application is copied, it saves preferences in that location. Don’t confuse the “Library” local to your home folder with the global “Library” at the root of the system, since you’ll rarely need to touch the latter. On the Mac there’s no Registry, and so no nightmare of maintaining one. When an application starts behaving strangely, the first thing to try is deleting its .plist file.
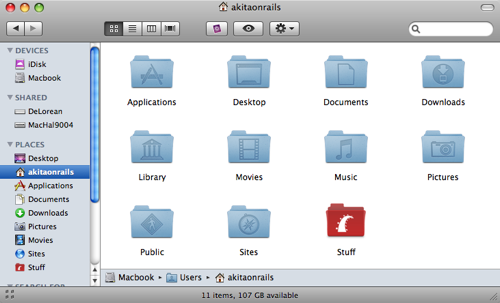
On the Mac, Finder doesn’t show every directory. Most are hidden, like /usr, /bin, /tmp, /dev, /var, /etc, and others that Unix or Linux users will recognize. Some important ones like System and Library at the root of your Mac are rarely accessed. User accounts live in the Users folder and applications in the Applications folder. Inside your “Home” folder are folders like Desktop, Documents, Downloads, Music, Movies, Pictures, Sites, Public, and Library. In that Library are things like “Application Support,” where plugins and other application dependencies live, and “Preferences,” which I explained earlier. Poke around these folders; the naming is fairly obvious.
Inside the “Applications” folder there’s another called “Utilities” (also accessible via ⌘+Shift+U) with things like “Activity Monitor,” similar to the Windows Task Manager. There’s also “Console,” an easy way to review system log files. Another important one is “Disk Utility,” which does advanced things like repartitioning your disk non-destructively, creating DMG files including encrypted volumes, burning DMGs to DVDs, and more.

Another difference from Windows: Macs don’t have drive letters (C:, D:, E:, and so on). The Mac, being a BSD Unix, behaves more like Unix/Linux, where DMG and ISO files are “mounted” inside the /Volumes directory and show up normally as disks in Finder that can be ejected. The Mac is very flexible with disk images: you can use Disk Utility to create bootable USB drives, create multiple boot partitions, copy DVDs into DMGs, and such. Network shared folders are also mounted in /Volumes. The behavior is consistent and fast, and Finder, unlike Windows Explorer, rarely crashes and almost never returns to an inconsistent state.
A technical detail you’ll notice: Finder (including the top menu and Desktop), the Dock, and applications are very independent. On Windows, especially XP, you’ll remember an application sometimes getting sluggish, hard even to drag, making it difficult to click the Start menu or taskbar. On the Mac, even when Finder crashes or gets slow, the Dock behaves independently. Other applications aren’t affected either, including their window refresh. Another tip: if an application truly freezes, use ⌘+⌥+⎋ (Command+Option+Esc) to open a window where you can force-quit it. And ⌘+Shift+Q forces the current user to log out.
Speaking of deleting: select files and use ⌘+Shift+⌫. That ⌫ key is called “Delete” but it’s the Mac equivalent of the PC’s “Backspace.” The Mac equivalent of the PC’s “Delete” key is Shift+⌫. You can also do more, like ⌥+⌫ to delete the whole word to the left of your cursor, or ⌘+⌫ to delete to the beginning of the line.
For navigating text, get used to combinations like ⌘+← and ⌘+→ to go to the beginning or end of the line, ⌘+↑ or ⌘+↓ for the equivalents of Page Up and Page Down, and ⌥+← and ⌥+→ to move by word left or right. These keys become second nature because you use them constantly.
If you’re in a text editor (Mail.app, Safari, TextEdit, and so on) and the text is too small to read comfortably, use ⌘-Shift-’+’ to increase the font size and ⌘-Shift-’-’ to decrease it. To zoom in on an image or small detail, hold Ctrl and drag two fingers up on the trackpad to zoom in, or two fingers down to zoom out.
Still on text: if you select a passage in any application, you can drag it to the desktop or another folder in Finder. It’s saved as a “snippet,” like a persistent clipboard item you can drag back into another text editor or leave on the desktop until you decide what to do with it.
All MacBooks, including older ones, have always had a two-finger multi-touch action for scrolling. Just slide two fingers, without clicking, up or down on the trackpad to scroll, for example in Safari.
Before Lion, there was a feature to encrypt your files in real time. It was called FileVault and was bad enough to ignore. But from Lion onward, FileVault 2 arrived, completely different and this time so good it would be foolish not to use it. Open “System Preferences, Security & Privacy,” the “FileVault” tab, and enable full disk encryption. VERY IMPORTANT: it generates secure keys that allow decryption of your data. Write them down somewhere safe and never lose them. One tip: grab your iPhone or any smartphone with a camera and take a photo of the screen when it shows you the keys.

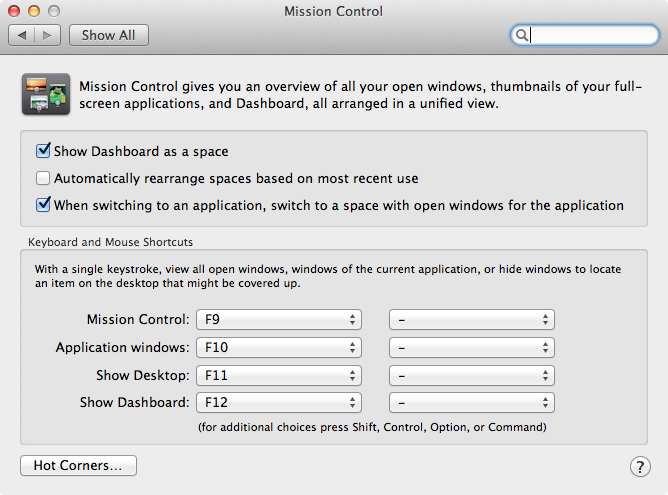
- From Lion onward there’s Mission Control, which you activate by placing four fingers on the trackpad and swiping up. It’s a replacement for the old Exposé and genuinely handy once you get used to it. When “maximized,” applications become their own parallel “Space,” and you navigate between them by swiping 3 fingers left or right. The default, though, has these Spaces rearranging automatically based on usage. I don’t like that, because I prefer my applications and desktops always in the same position (in Mission Control you can drag Spaces to wherever you like). To disable the forced rearrangement, go to “System Preferences, Mission Control” and turn off “Automatically rearrange spaces based on most recent use.”
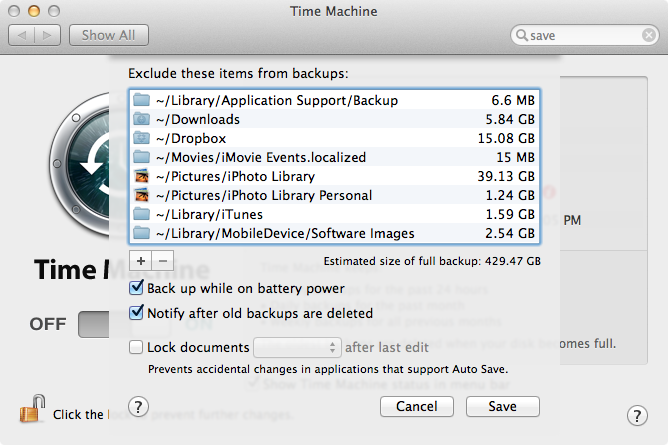
- Also from Lion onward, the way you save files changed a lot. There’s now an “Auto Save” feature. So if an unexpected crash happens, or you have to force-shutdown the machine, or any drastic situation where you’d lose what you were editing, don’t worry, because Lion is saving automatically. There is one annoyance, though: the file sometimes gets a “Lock” that prevents you from editing it. You can unlock it manually, but it’s a hassle. I prefer to turn it off by going to “System Preferences, Time Machine,” clicking the “options” button, and disabling “Lock documents.” While you’re there, check the photo below for how to do that, and also what I keep on my Time Machine exclusion list, things I’d rather not back up either because they don’t matter (Software Images, for example) or because I prefer to back them up manually (iPhoto).
Still on the new Lion way of handling documents and versions: in new applications you now have a “Save a version” option in the menu, so you can save moments in time in case you need to go back and recover an earlier state. Think of it as a mini Time Machine or granular backup. One option that no longer exists is “Save As,” which let you save the same file under a different name. Instead the operation is a bit more annoying: first “Duplicate” (all in the same main “File” menu) and then “Save” to store it under a different name. Get used to it; it’s annoying at first but becomes trivial.
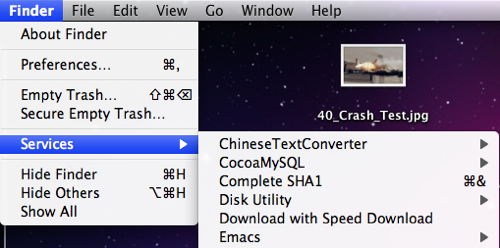
The Mac has plenty of unexpected surprises. In the main menu, the item with the application’s name always has a sub-item called “Services.” Try selecting a block of text in any application, then go to the “Services” menu, then “Speech,” then “Start Speaking Text,” and the Mac reads the selected text aloud. Unfortunately there’s no option in Portuguese.
In Finder you have the “Go” menu, then “Connect to Server,” or the shortcut ⌘+K, to connect to shared folders on other Macs or on your company’s Windows file server. For a Windows server you’re used to typing something like \server\folder. On the Mac you type something like smb://server.domain/folder. If your server is Windows 2000 or later, include the full server name, including the root domain of your directory. Usually that’s all you need.
There’s no shortcut to force-lock your computer so nobody can access it while you’re away. One way is the screen saver. First, open “System Preferences” and “Security” and enable “Require password to wake this computer from sleep or screen saver.” Now, still in “System Preferences,” choose “Desktop & Screen Saver,” then “Screen Saver.” On that screen there’s a “Hot Corners” option where you can pick a corner that starts the screensaver when you move the mouse there. That gives you a quick way to lock your computer.
Every time you download a program from the internet, the first time you run it the Mac shows you the URL it was downloaded from and asks for confirmation. To be prompted whenever you or something tries to modify a system setting, go to “System Preferences,” “Security,” and enable “Require password to unlock each System Preferences pane.” The Mac warns you whenever something tries to escalate authority, and you enter your administrator password to confirm. For Linux users, it’s like using “sudo” in the Terminal. The Mac is quite secure: its architecture keeps trivial malware from taking over the machine the way it does on Windows, and that has nothing to do with market share, since the user has to explicitly do something foolish to get compromised. Antivirus is only useful to make sure you don’t forward someone an infected attachment you received. Your machine stays fine, but you might pass the virus along by accident.
You’ll miss programs like Norton Utilities because you simply don’t need them. For a defragmenter, for example, Mac OS defragments automatically for you. Also understand that your filesystem is HFS+, not FAT or NTFS. One quirk is that HFS+ has Resource Forks, so when you copy Mac files to FAT USB drives you end up with what look like “duplicate” files with an underscore at the start of the name, which is the resource fork representation on filesystems that don’t support it. Also understand that every Mac “application” is actually a folder with a “.app” extension and an icon. When transporting applications, don’t copy them straight to a FAT USB drive; first put them in a DMG or just zip them (the “Archive” option in the context menu), then copy. Remember too that Unix files have permissions and FAT doesn’t preserve them.
The equivalent of Windows Startup Items is in “System Preferences,” “Accounts,” your user, “Login Items.”
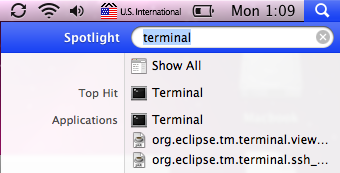
The Mac is a BSD Unix. As such, it has a Terminal application in the Utilities folder. Use Spotlight to reach it easily. It opens a BASH shell, and from there you can manipulate files and programs easily in a POSIX environment. If you come from Linux, you’ll feel right at home.
Speaking of Linux, one weak spot is the lack of a good package manager. On Ubuntu/Debian we have apt-get; on Redhat/Fedora/CentOS we have Yum. On the Mac there’s no standard. My recommendation is HomeBrew, a system for installing and maintaining open source projects. It’s not as powerful or robust as Aptitude on Ubuntu, but it does its job well. You’ll also come across others like MacPorts and Fink, but they’re either outdated or more hassle, so I don’t recommend them. See the next tip.
HomeBrew is the best installer for open-source software like MySQL, PostgreSQL, Redis, Git, Android SDK, and much more. In some cases it downloads the Mac binary directly, but usually it downloads the source code, applies necessary patches, and compiles. For that you need compilers and other tools. The simplest way is to use the App Store to buy and download XCode. This tip is more for software developers; if you’re not one, you can ignore it.
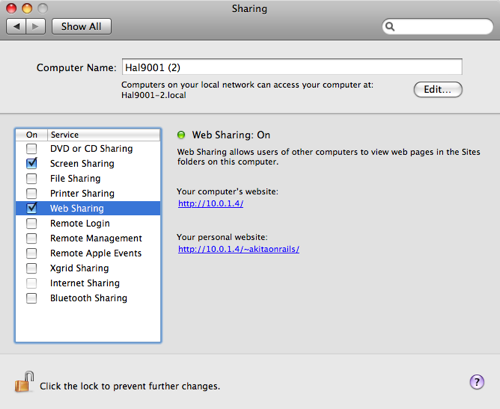
Every Mac comes with Apache 2 pre-installed. It’s hidden under the name “Web Sharing.” You’ll find it in System Preferences, “Sharing,” then “Web Sharing.” When you turn this on or off, you’re dealing with Apache 2, which by default looks at the “Sites” folder in your Users/Home directory. Another option, “Remote Login,” enables or disables OpenSSH access. “Screen Sharing,” in turn, activates a VNC server, so a VNC client on Windows can also share the screen of your Mac.
One weakness fixed from Snow Leopard onward is the Firewall. On Leopard and earlier it ships disabled. Open System Preferences again, option “Security,” then “Firewall.” It comes set to “Allow all incoming connections.” Change it at minimum to “Allow only essential services” or, better, “Set access for specific services and applications,” which works as a whitelist. Everything is blocked by default, and only the applications you select in the box below get open ports.
Lion is the most practical version for disaster recovery. There’s no more boot DVD. Every Mac now has a hidden partition with the installer, for when you need to reinstall, check disks, or do other things. Just boot while holding (Command-R) ⌘-R, or hold the (Option) ⌥ key during boot to get a menu with the available partitions and choose “Recovery HD.”

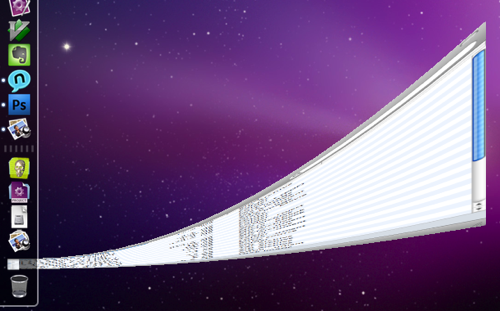
- Finally, to impress your friends: when you minimize a window, use Exposé, or activate the Dashboard, all these actions have animated transitions. Hold the “Shift” key at the same time and the animation plays in slow motion, showing every step of the transition at slow speed :-)
Applications
Some of the applications below are on the Mac App Store, and I always recommend checking there first. Otherwise, follow the links and download manually. At the end of this section I have a tip on keeping your applications up to date.
If you have an iPad, you can use it as a second monitor connected to your Mac over Wi-Fi (both need to be on the same network). For this, buy Air Display.
If you have a new Apple TV (the small black model), you can mirror the screen of your iPhone 4S, iPad 2, or later over Wi-Fi using the Air Play feature on iOS. The next version of Mac, Mountain Lion, will let you do the same from your Mac. Until then, you can still mirror your Mac to an HDTV via Apple TV by buying Air Parrot. It’s the simplest way to watch movies and videos from your Mac straight on your TV.
I personally love reading a lot of RSS and Atom feeds in my Google Reader account, and the best Mac and iOS app for that is easily Reeder.
With so much internet content, you download a lot but don’t always know which files are eating the most disk space. To find them (tip: most of the time it’s your video podcasts in iTunes) there are excellent paid apps like DaisyDisk, but I still like the free GrandPerspective.
OS X handles compressed formats like zip and gz on its own. But to decompress more interesting formats like 7-zip and rar, be sure to install The Unarchiver.
For applications, use sites like Apple’s own to see what’s most popular. To start, you’ll want Perian for more video codecs, Flip4Mac for Windows codecs, and VLC for a player that handles all the strangest codecs.
To rip DVDs and create mp4 files, use the freeware HandBrake. To convert videos for iPod and iPhone, use iSquint. To create, edit, and convert subtitle files, use Miyu and Submerge.
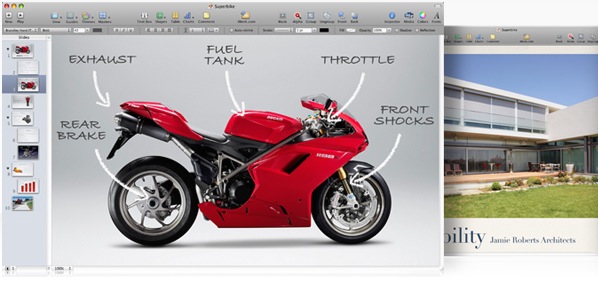
For presentations, forget Powerpoint. It’s very worth buying iWork to use the famous Keynote. The iLife and iWork suites are all on the App Store, so buy them there.
For communication, use Adium, a client for Jabber, Messenger, Yahoo, AIM, and more, one of the best around, though it doesn’t yet support video chat for Messenger. The classic Skype is another great option. If you like IRC, one of the best clients is Colloquy.
You want to run Windows or some Linux distro. The option that comes with the Mac is Bootcamp (in Utilities), to repartition your HD and install a second operating system. Before that, though, I recommend virtualization products like the open-source VirtualBox, or the commercial Parallels Desktop or VMWare Fusion. They’re all very good. With them you can run Windows XP or Windows 7 (I don’t recommend Vista unless you have a desktop Mac with more than 4GB of RAM), Ubuntu, Fedora, and so on. In most cases, even heavy stuff like SQL Server with Visual Studio works great. For games, no, better to dual-boot, or better yet, buy a PlayStation 3 or Xbox 360.
The Mac is quite secure. Things like saving passwords in Safari go into an infrastructure called Keychain, an encrypted, secure storage. You can even encrypt your entire Home folder if you want. For other things, like sharing authentication data across multiple browsers or just storing notes securely, I suggest 1Password, one of the best out there.
Macs normally don’t need uninstallers. For the vast majority of programs you just drag them to the Applications folder, so you delete them from there. They do leave behind a few artifacts, like files in the Library/Preferences directory. Normally it’s fine to leave them; they’re tiny and don’t corrupt anything like a Registry. But if you’re the paranoid type who needs to remove everything, use AppZapper, which does it for you.
Anyone who’s watched Mac screencasts online might wonder, “How do they do that?” One of the secrets is the commercial ScreenFlow, by far one of the best, most performant, and easiest to use. Worth every cent. To record the keyboard shortcuts you’re using as a layer on top of your video, use KeyCastr. For mouse effects like focus and others, use OmniDazzle.

The Mac needs very little maintenance, and most tools are already built into the operating system. As a visual shell to reach them more easily, use Onyx, which runs all the maintenance scripts at once. Sometimes, when your Mac starts behaving strangely, running Onyx helps a lot, though that situation is very rare.
As a text editor there’s no getting around it: after 3 years my favorite is still TextMate. If you’re more of a Linux purist, you might prefer MacVim, especially with my Ruby snippets package :-) Beyond those, there are dozens of other editors, but none really appealed to me. A plugin that makes TextMate even nicer is MissingDrawer, which I recommend trying. If you’re a developer, follow my vimfiles repository to get your Vim pre-configured with the best of what’s available.
For downloaders, Mozilla Firefox has various extensions, or if you’re a solid Linux user you’ll know how to use good old curl. But if you want something more visual, an excellent commercial alternative is Speed Download, which has options for parallel downloads, resuming interrupted downloads, and so on. Still on downloads, if you’re into BitTorrent, one of the best clients is Transmission.
For burning DVDs, the Mac handles it reasonably well on its own. But if you want more control and detail, one of the most traditional and best commercial options is Toast by Roxio, the equivalent of Nero on Windows. For something simpler there’s Disco, one of the most visually beautiful, with a feature that keeps a database of DVDs you’ve burned to make searches easier. And a decent freeware is Burn.
Even though Time Machine already does an excellent job of backup, SuperDuper! remains an excellent alternative. It makes a bit-for-bit image of your system, supports delta updates, and lets you create bootable external hard drives. It’s a good thing to do before anything drastic, like installing a new version of Mac OS. It’s the equivalent of Norton Ghost on Windows.
If you’re a developer using Git with Gitk, you can install Git via HomeBrew (with HomeBrew installed, just open a Terminal and use “brew install git”) and then use Gitx instead of the ugly Gitk. It uses Cocoa components, so it has the look and feel of a native Mac app.
If you have an iPod, know that it can play Audiobooks. Unlike mp3 and aac, the standard audiobook format is m4b, or mpeg-4 with bookmark support. That’s very important because mp3 has no bookmarks, and when a book is 20 hours long it’s painful if your iPod loses your place, or worse, if you want to navigate between chapters of a 40-hour book. If you have audiobooks in mp3, use Audiobook Builder, which compiles all the mp3s into a single m4b that your iTunes syncs to your iPod.
You were a Windows developer with dozens of e-books in Microsoft’s CHM (compiled HTML) format. Fortunately, on the Mac you have the open-source reader Chmox.
Say you have two computers, or some external hard drives, and you need to keep some folders in sync. Again, if you’re a solid Linux user, you can comfortably use “rsync” from the command line. But if you want a visual shell for rsync, a great option is ChronoSync, which allows bi-directional synchronization and much more. It’s how I keep two 500GB external hard drives synced through my Mac Mini, a poor man’s RAID 1 :-)
A well-known subsystem is Growl, a notification infrastructure. For example, when an application like Transmission finishes a download, it sends a message to Growl, which pops up on your desktop to notify you. Adium also uses it to show who came online, and so on. Growl ships with plugins for iTunes and Mail.app, plus a command-line tool to integrate with other applications.
Mail.app is organized with a list of emails on top and a view of the selected email below. Some prefer vertical bars instead of horizontal, more like Outlook. In that case use the LetterBox plugin for Mail.app.
A famous but more advanced application is the legendary QuickSilver, which some see only as a fast way to find applications, but which is really a sophisticated environment for chaining functionality. You can, for example, find and select several files, attach them to an email, and send it to an address in your Address Book. It has dozens of plugins and themes for customization. It’s interesting at first, and there are various clones with the same idea, but in the end you’ll notice you mostly use it just to find applications. And for that, the simplest thing is Command ⌘ + Space to activate Spotlight (the magnifying glass in the upper-right corner) and type the application’s name. Same for finding documents. I find it more practical and faster.
Those coming from Windows might still need to reach their old machine, or at the office deal with Windows programs. Fortunately, Windows has RDP (Remote Desktop Protocol) for remote access. On the Mac the best option is CoRD, the equivalent of a Terminal Client.
A very useful utility for monitoring your CPU, RAM, disk, and network usage is iStat Pro, which has a widget version for the Dashboard, or iStat Menu for the top menu bar. I personally prefer the second, but both are very good.
A well-known benchmarker in the Mac world is XBench, which tests your Mac and lets you compare results on their website against other Macs.
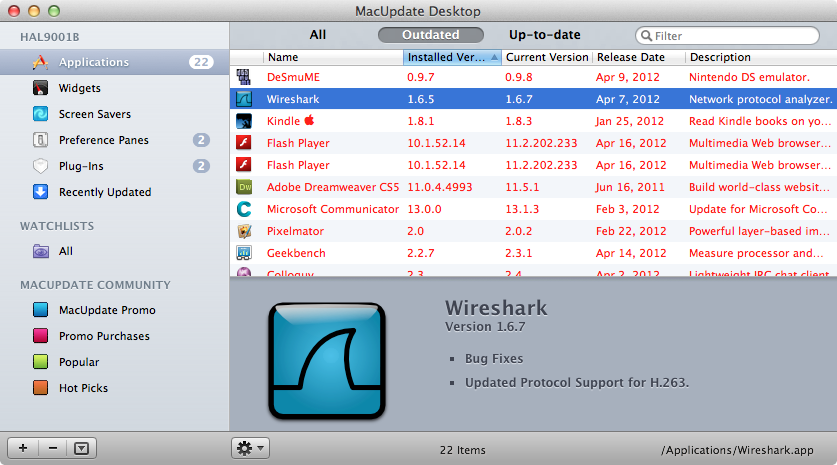
The last tip is to create an account on MacUpdate and then download the MacUpdate Desktop software. Open it occasionally and it tells you everything that’s outdated on your machine, letting you pick what to update:
History
To understand Mac OS X, you need to understand its history. For that, the best set of articles are the ones ArsTechnica has written since 2000:
Also understand that Mac OS X is completely different from its predecessor, the Mac OS, which ended its life at version 9. When Steve Jobs was forced out of Apple in 1985, he founded the company Next and built the NextStep operating system, a 32-bit, multitasking OS with a Mach-based kernel. Watch Steve Jobs himself demonstrating NextStep version 3. NextStep was later opened as a standard together with Sun as OpenStep. The WindowMaker window manager is inspired by OpenStep and supports its open-source implementation, GNUStep. Later, in 1997, Apple reacquired Next, and NextStep became the foundation for Mac OS X. Its development framework was renamed Cocoa, which is why the development APIs have names like NSString and NSWindow, where “NS” stands for “NextStep.”